Trading
A Quick Start for Trever Trading
1. Go to the Trading Portal
- On the Trever main screen click the
Trading Portalicon or chooseTrading Portalin the sidebar.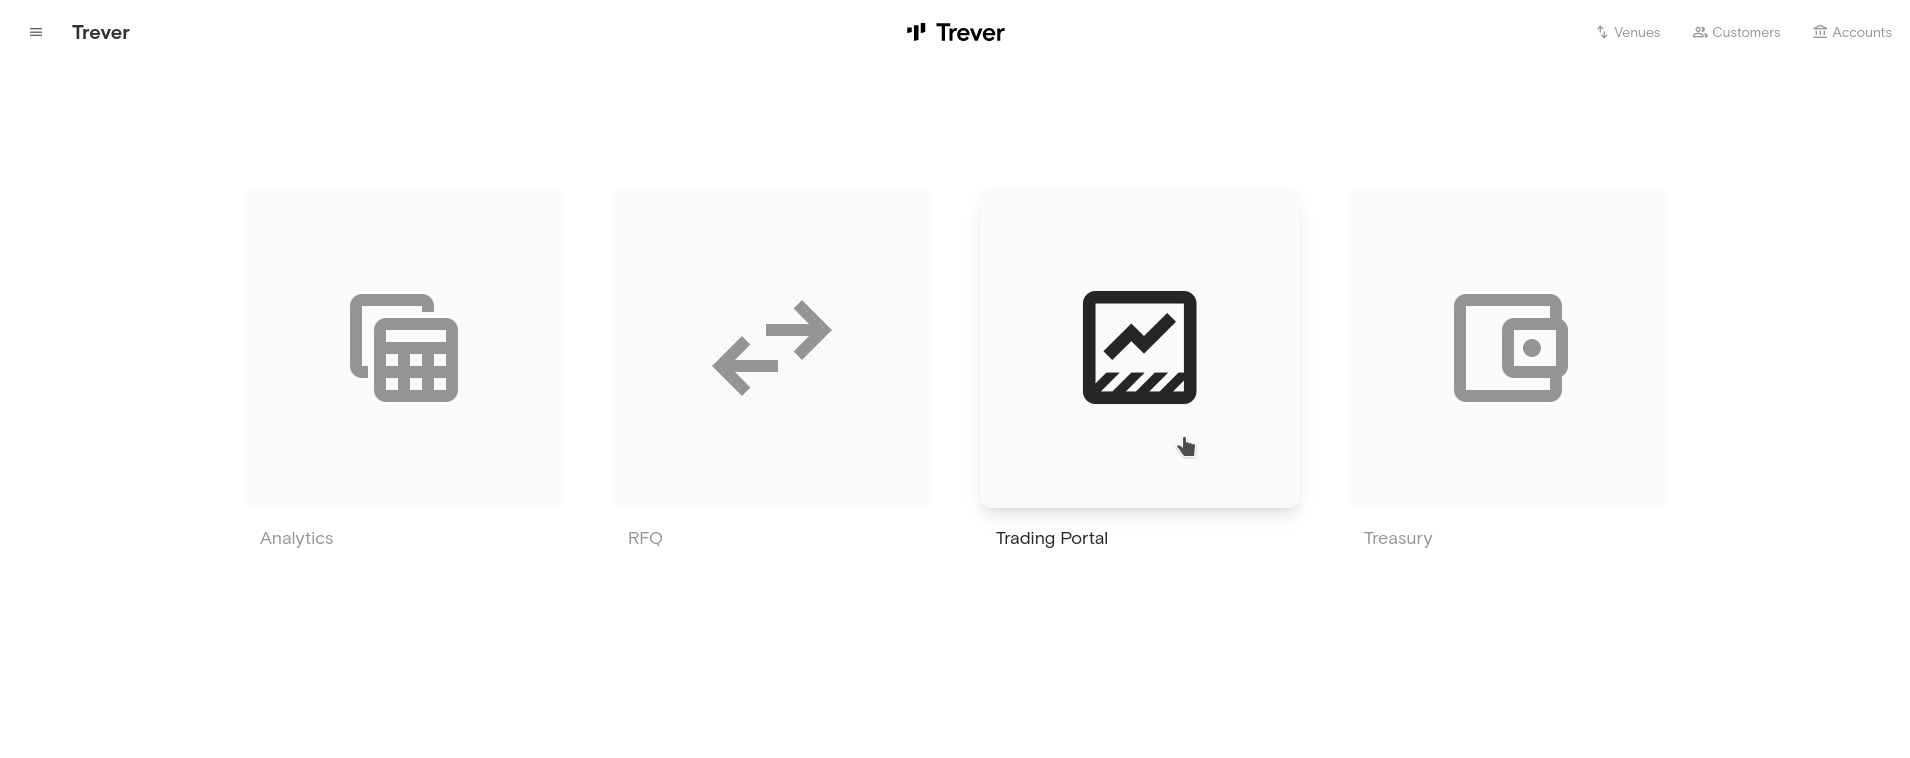
2. Check Trading Venues
- To start trading in Trever, make sure that at least one trading venue is integrated. If this has not yet happened, please contact Trever. We will be happy to set up the desired venue for you.
- To check whether the required services are running, click on the
Venueicon in the top right-hand corner of the screen.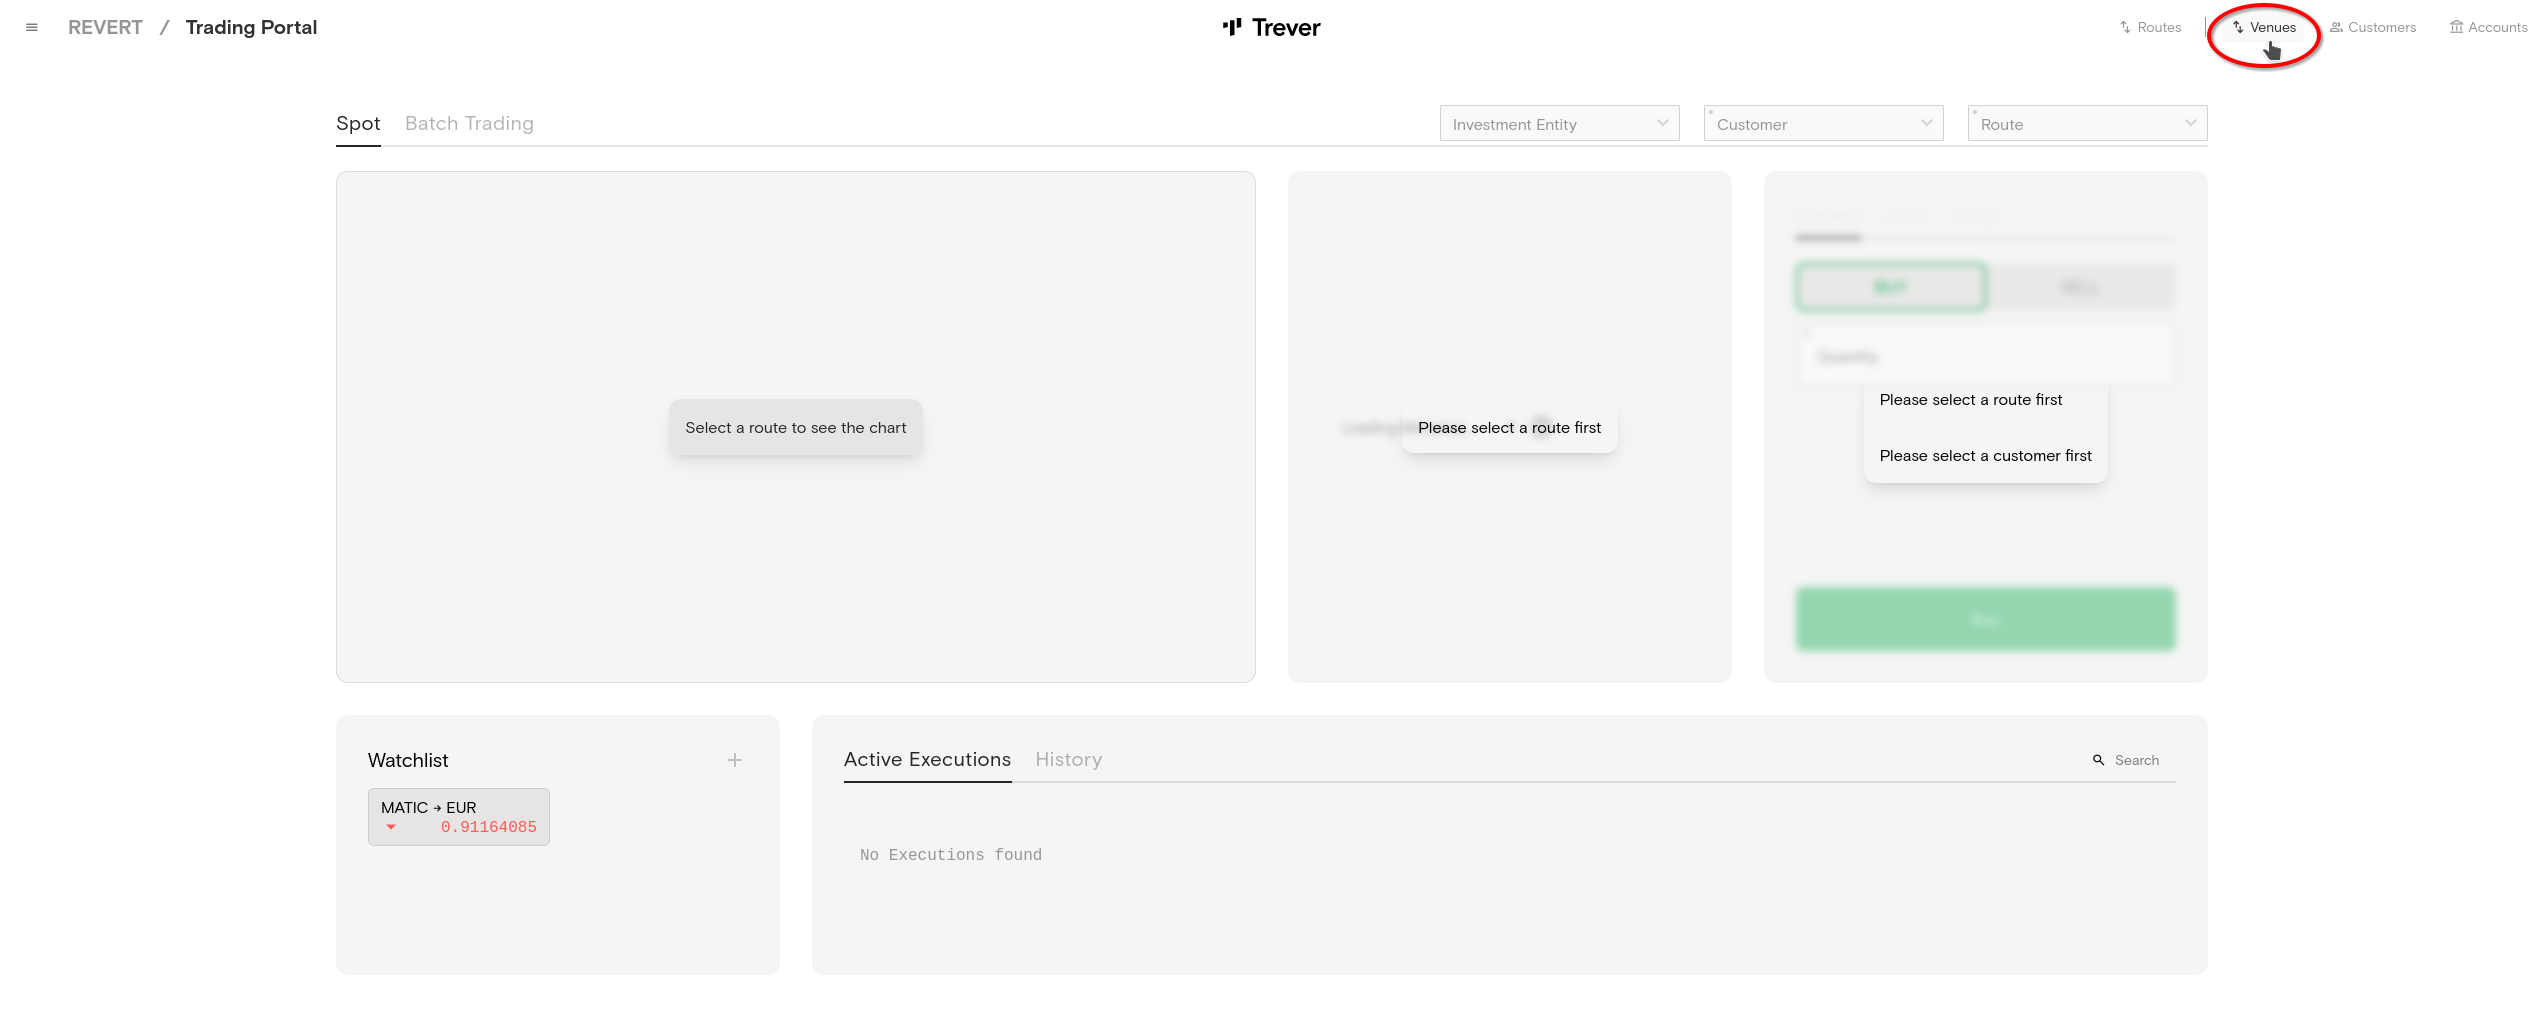
- On the
Venuescreen, click on the desired venue and go to theServicestab. In theServicestab make sure the service typeTOMSis running.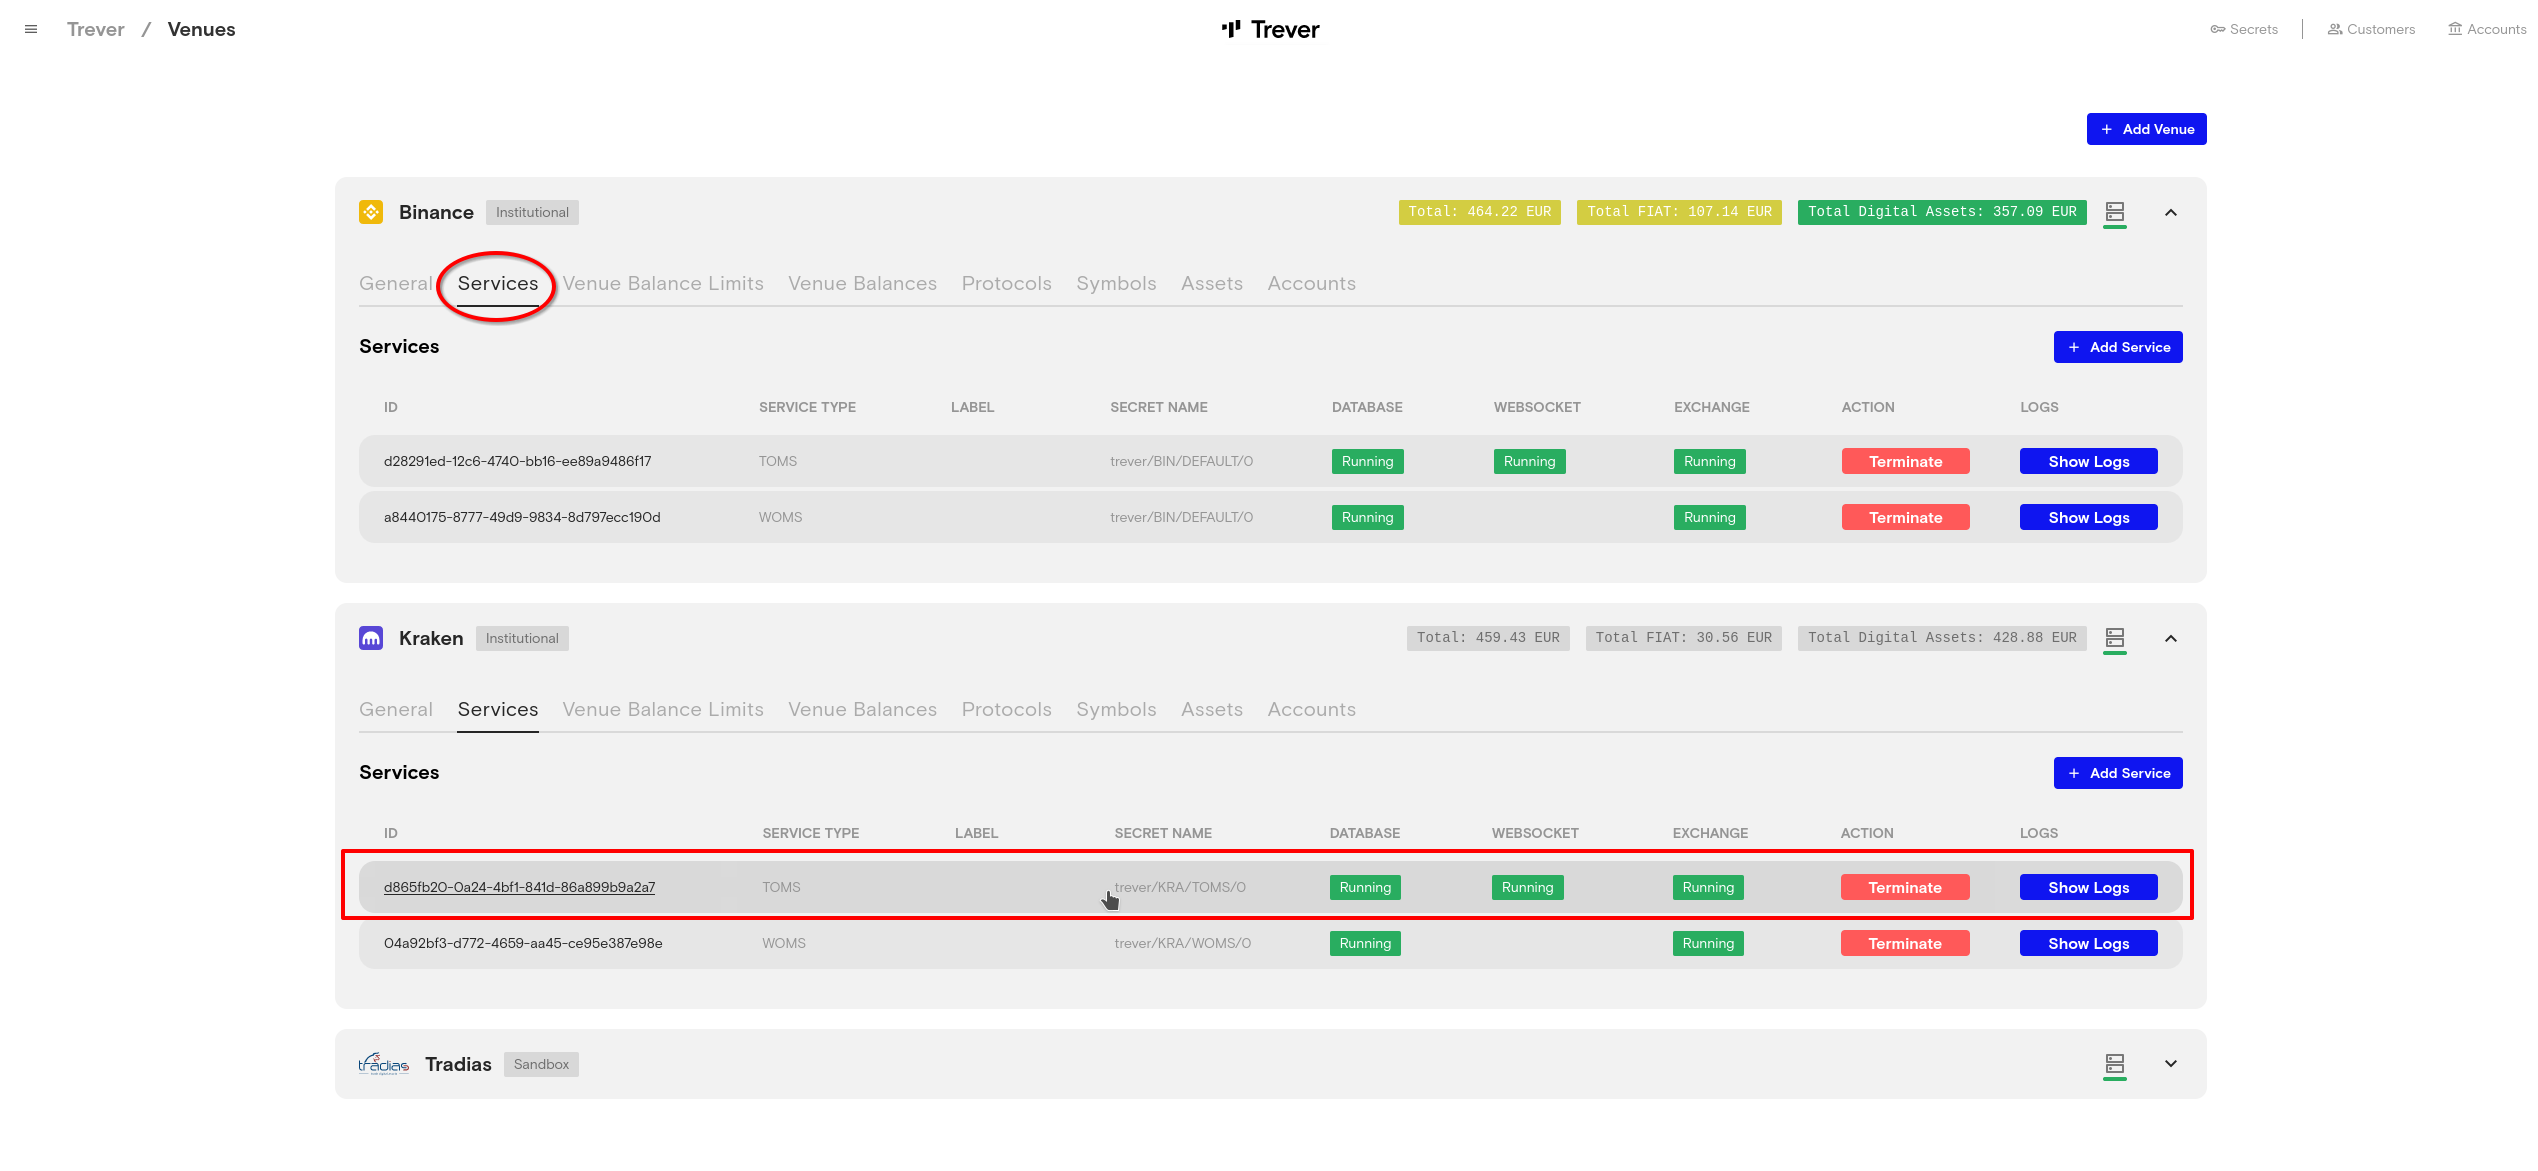
- If the TOMS service is running, this venue can be used for trading.
3. Create Customer
- On the Trading screen click the
Customersicon.

- To create a customer in Trever, click
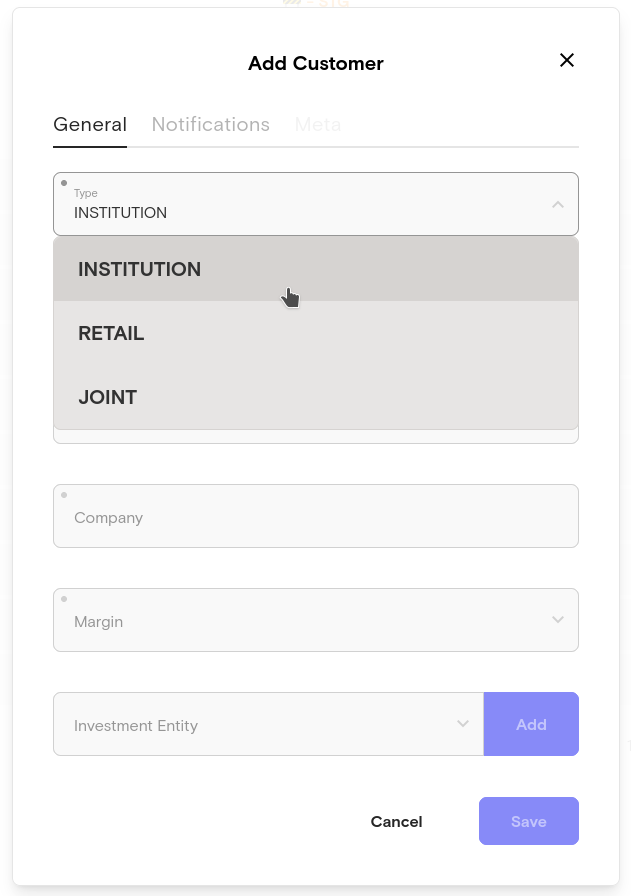
Add Customerat the top right-hand corner of the Customer screen. - Trever distinguishes between 3 types of customers. The
INSTITUTIONtype is selected for corporate customers or companies, theRETAILtype is selected for individual private customers andJOINTis selected when private customers join together to make joint investments.
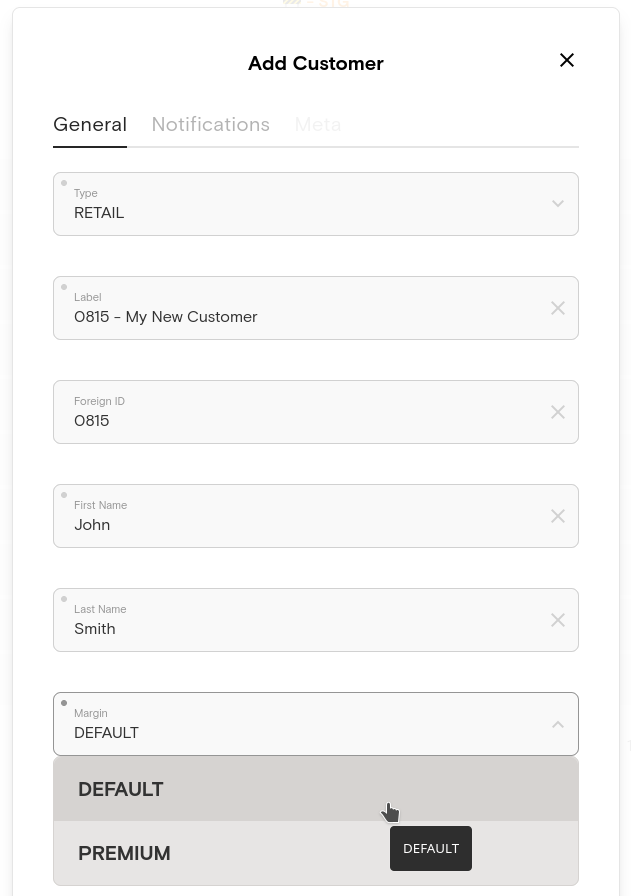
- Depending on which customer type has been selected, the dialogue shows the fields
Last NameandFirst Name,Company Name, orJoint Name. - Select a
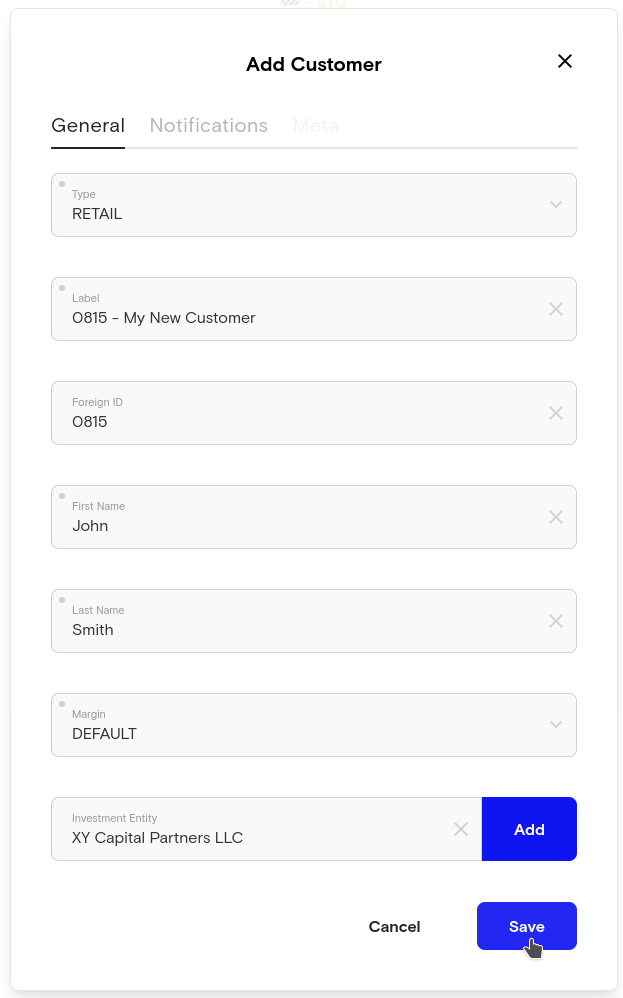
Marginfor the customer. If the margin settingUse defaultis selected in a trading route, this setting takes effect. The value forDEFAULTandPREMIUMmargin is set in the workspace settings. Workspace Settings
- Optionally, a customer can be assigned to one or more Investment Entities.
4. Create a Trading Route
- Back in the trading portal, Click on the
Routesicon in the top right-hand corner of the Trading screen.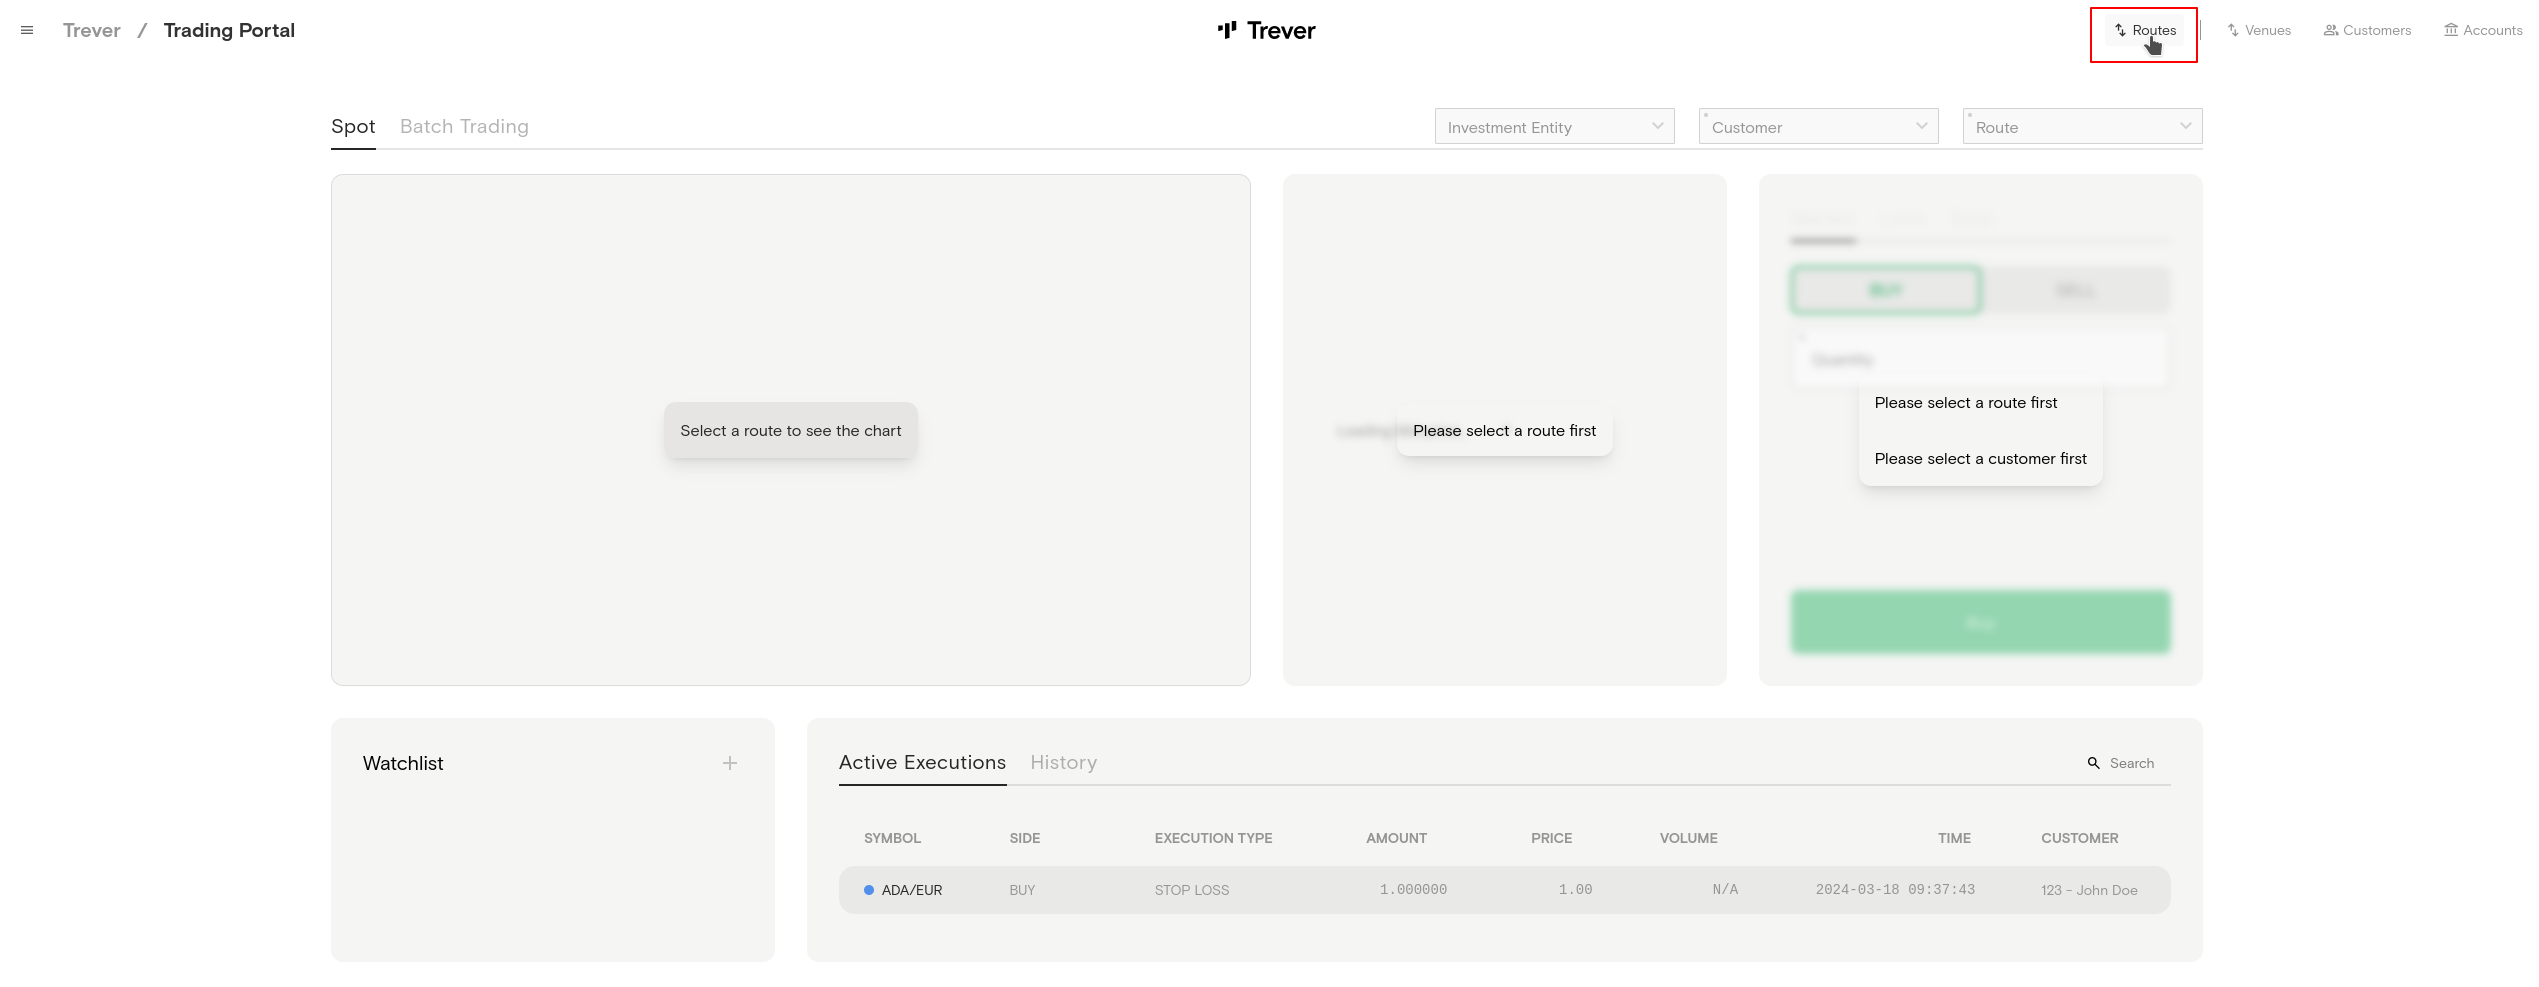
- Click on
Add Routeto create a new route. - Choose a
label. It is recommended to choose a label name that tells the user what a route does or identifies routes without clicking them. - Select a
Base Asset. The base asset is the asset that is bought in a buy execution and sold in a sell execution. - Select a
Quote Asset. The quote asset is the asset that is used to pay for the base asset in a buy execution and is received as payment for the base asset in a sell execution. - Set a
Margin. The margin is the markup that is booked to the revenue account when a trade is executed with this route. The margin is always calculated in the quote asset. - Set a
Risk Quantile - Set a
Risk Duration. The risk quantile and risk duration determine the level of confidence and the timeframe for which the predicted price remains valid. Risk Quantile / Risk Duration - For
Margin,Risk Quantile, andRisk Durationa default value can be set in the workspace settings. Workspace Settings - Set
Hopsfor the route.
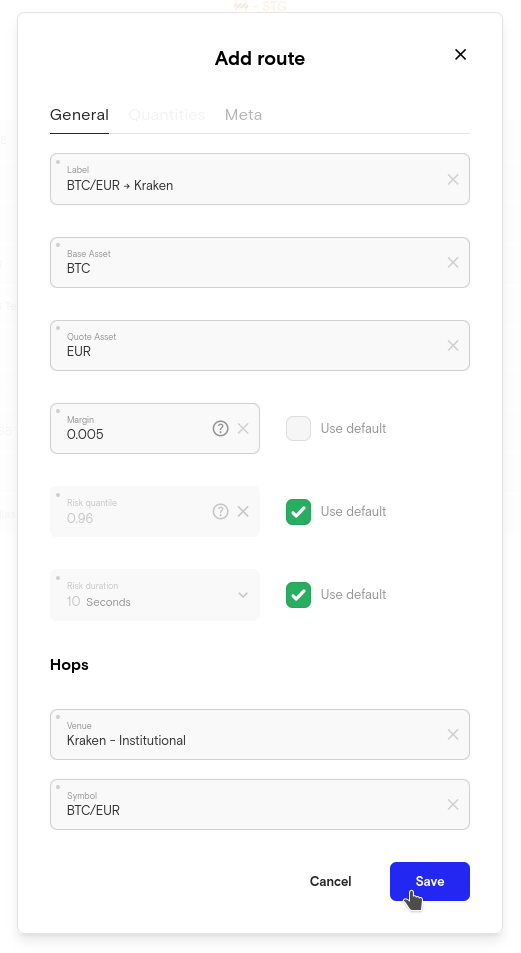
- If the desired symbol is not available, a route can use multiple hops:

5. Place an Execution in the Trever Trading Portal
- Select a trading route from the
Routedrop-down menu. - Then select a customer from the
Customerdrop-down menu. - Optionally, select an investment entity from the
Investment Entitydrop-down menu. If a customer has only one investment entity, it will be selected automatically. - The trading screen now shows the order book and a candle stick chart for the selected trading pair (Symbol).
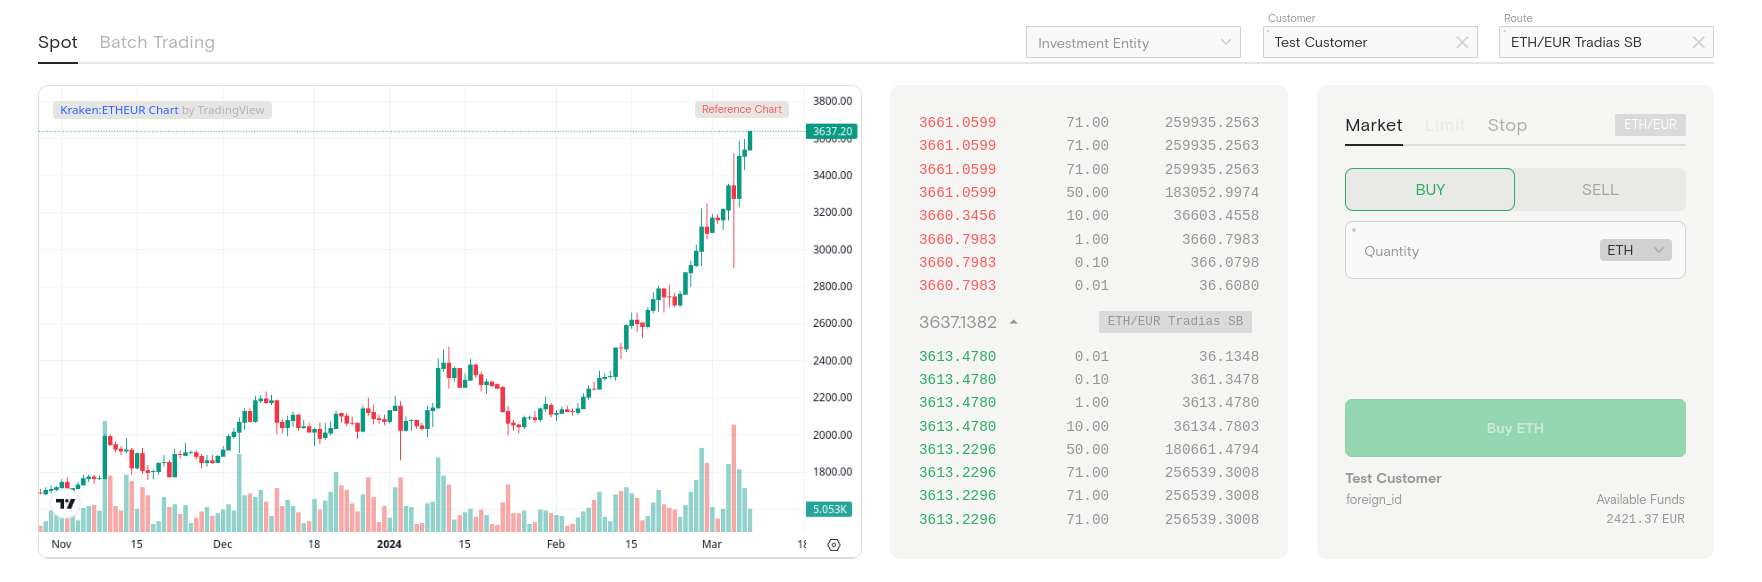
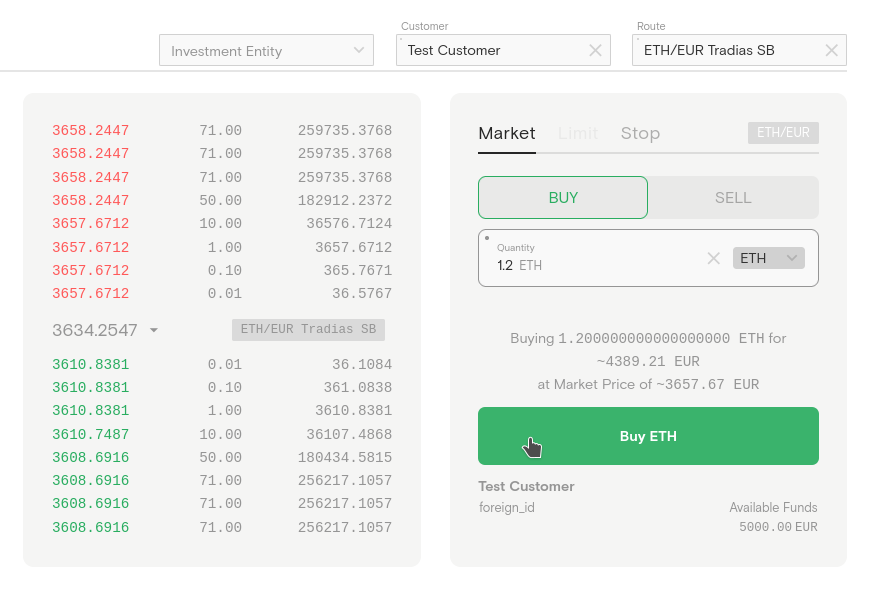
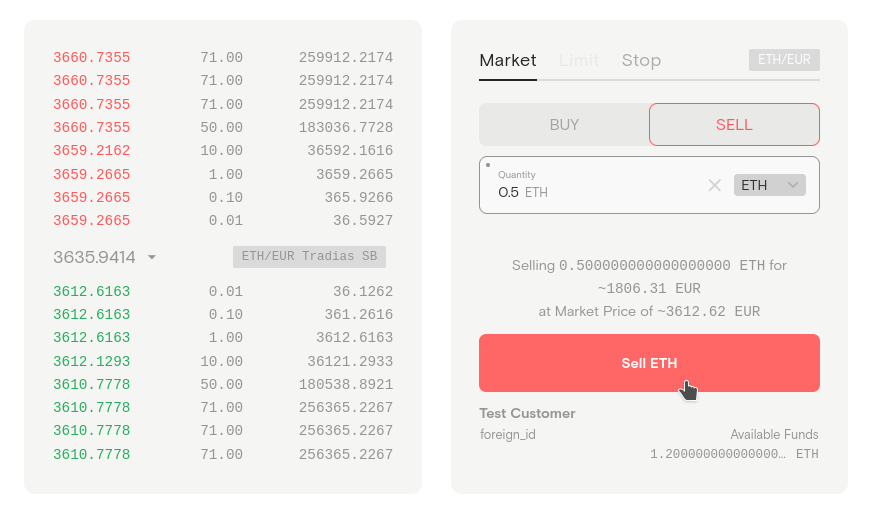
- Select between Buy or Sell.
- Select between Market.
- Enter the request quantity and request asset and the dialog will show the counter quantity and the current price.
- Press the
Buy/Sellbutton.
 \
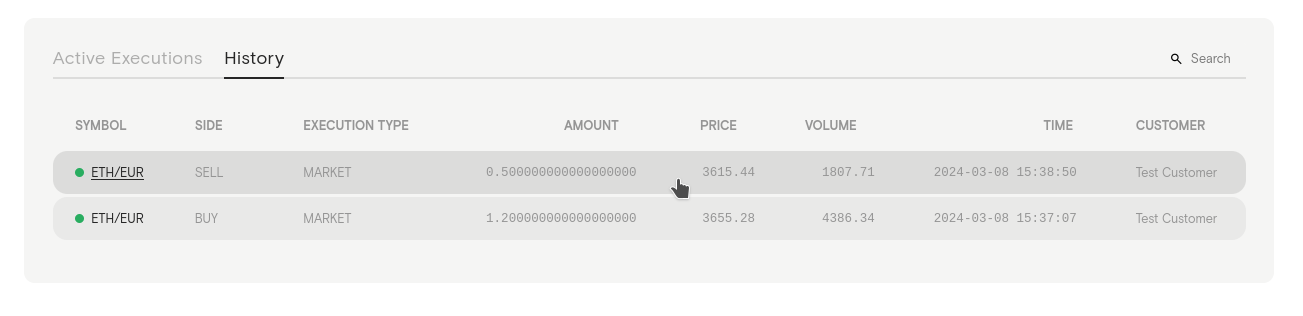
\ - The execution will appear in the list of
Active Executions - Once the execution is completed, whether successful or not, it appears in the execution
History