Treasury
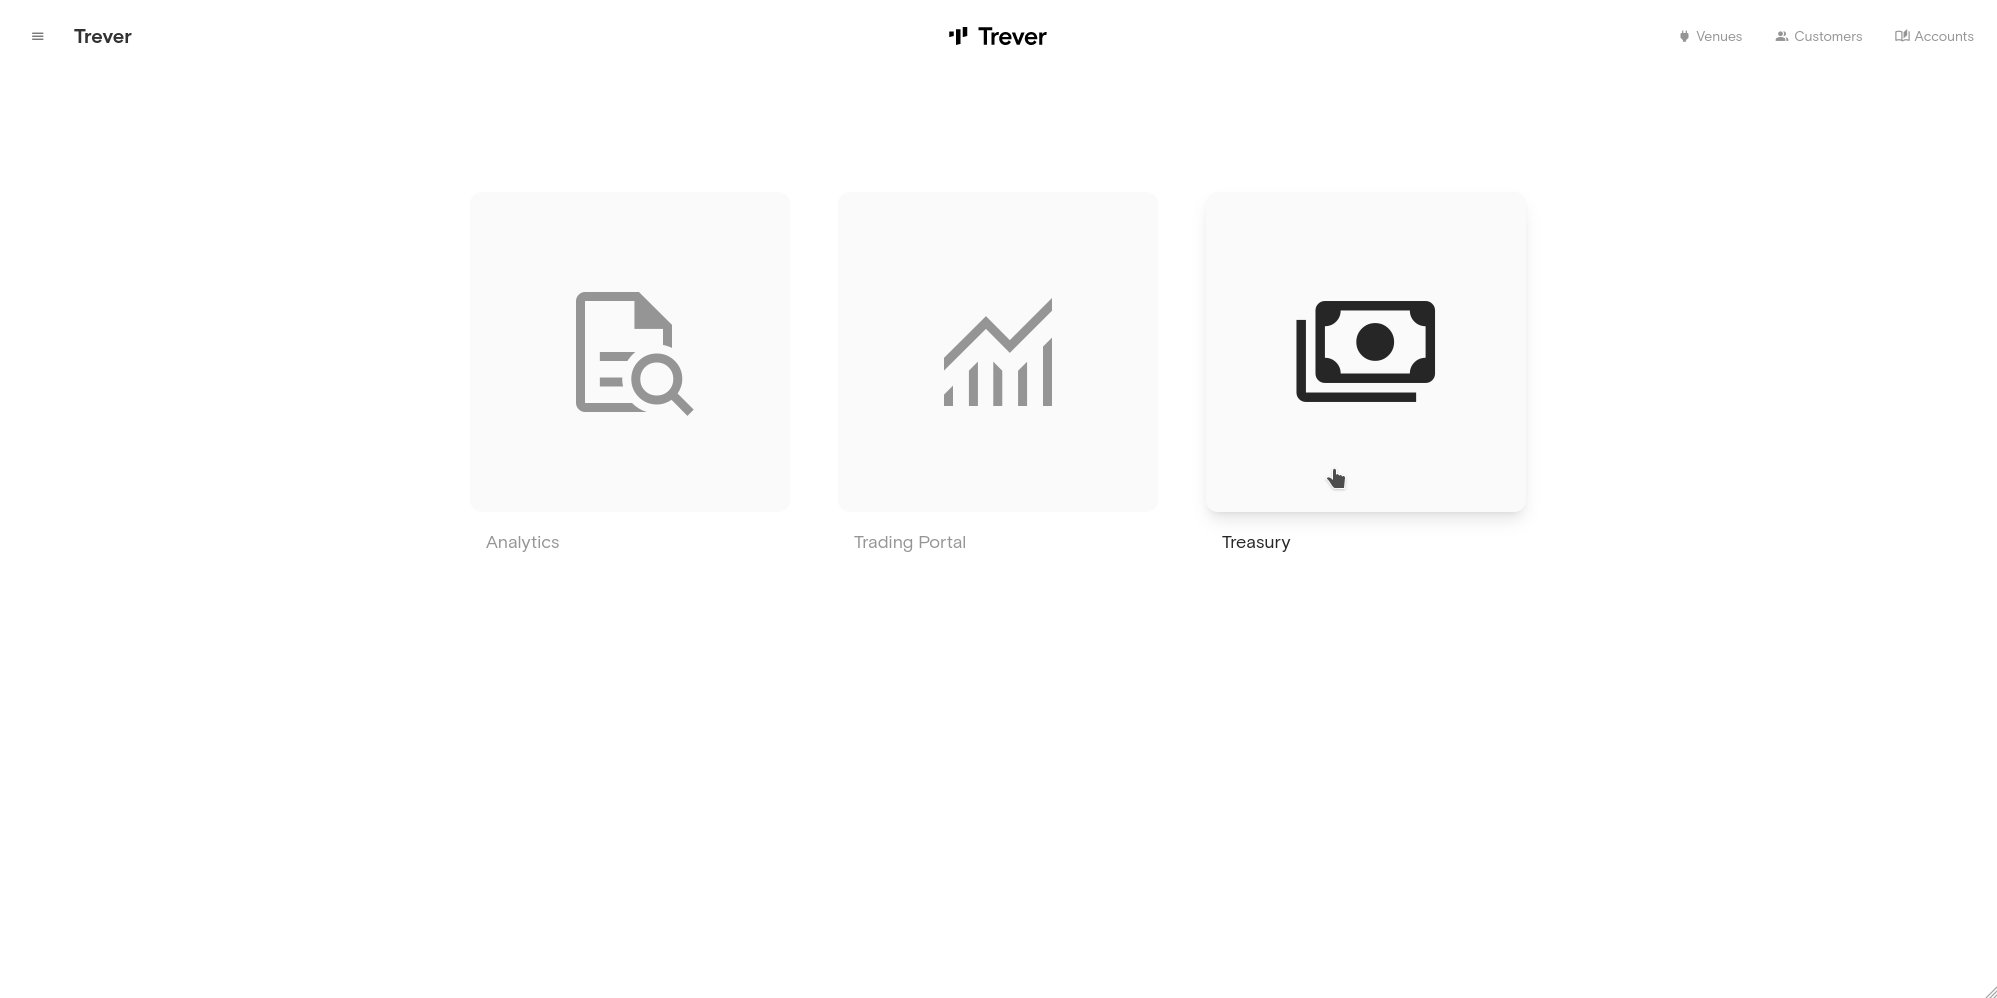
1. Go to the Treasury Portal
- On the Trever main screen click the
Treasuryicon or selectTreasuryin the sidebar.
2. Check Treasury Venues
- To withdraw assets in Trever, make sure that at least one treasury venue is integrated. If this has not yet happened, please contact Trever. We will be happy to set up the desired venue for you.
- To check whether the required services are running, click on the
Venueicon in the top right-hand corner of the screen.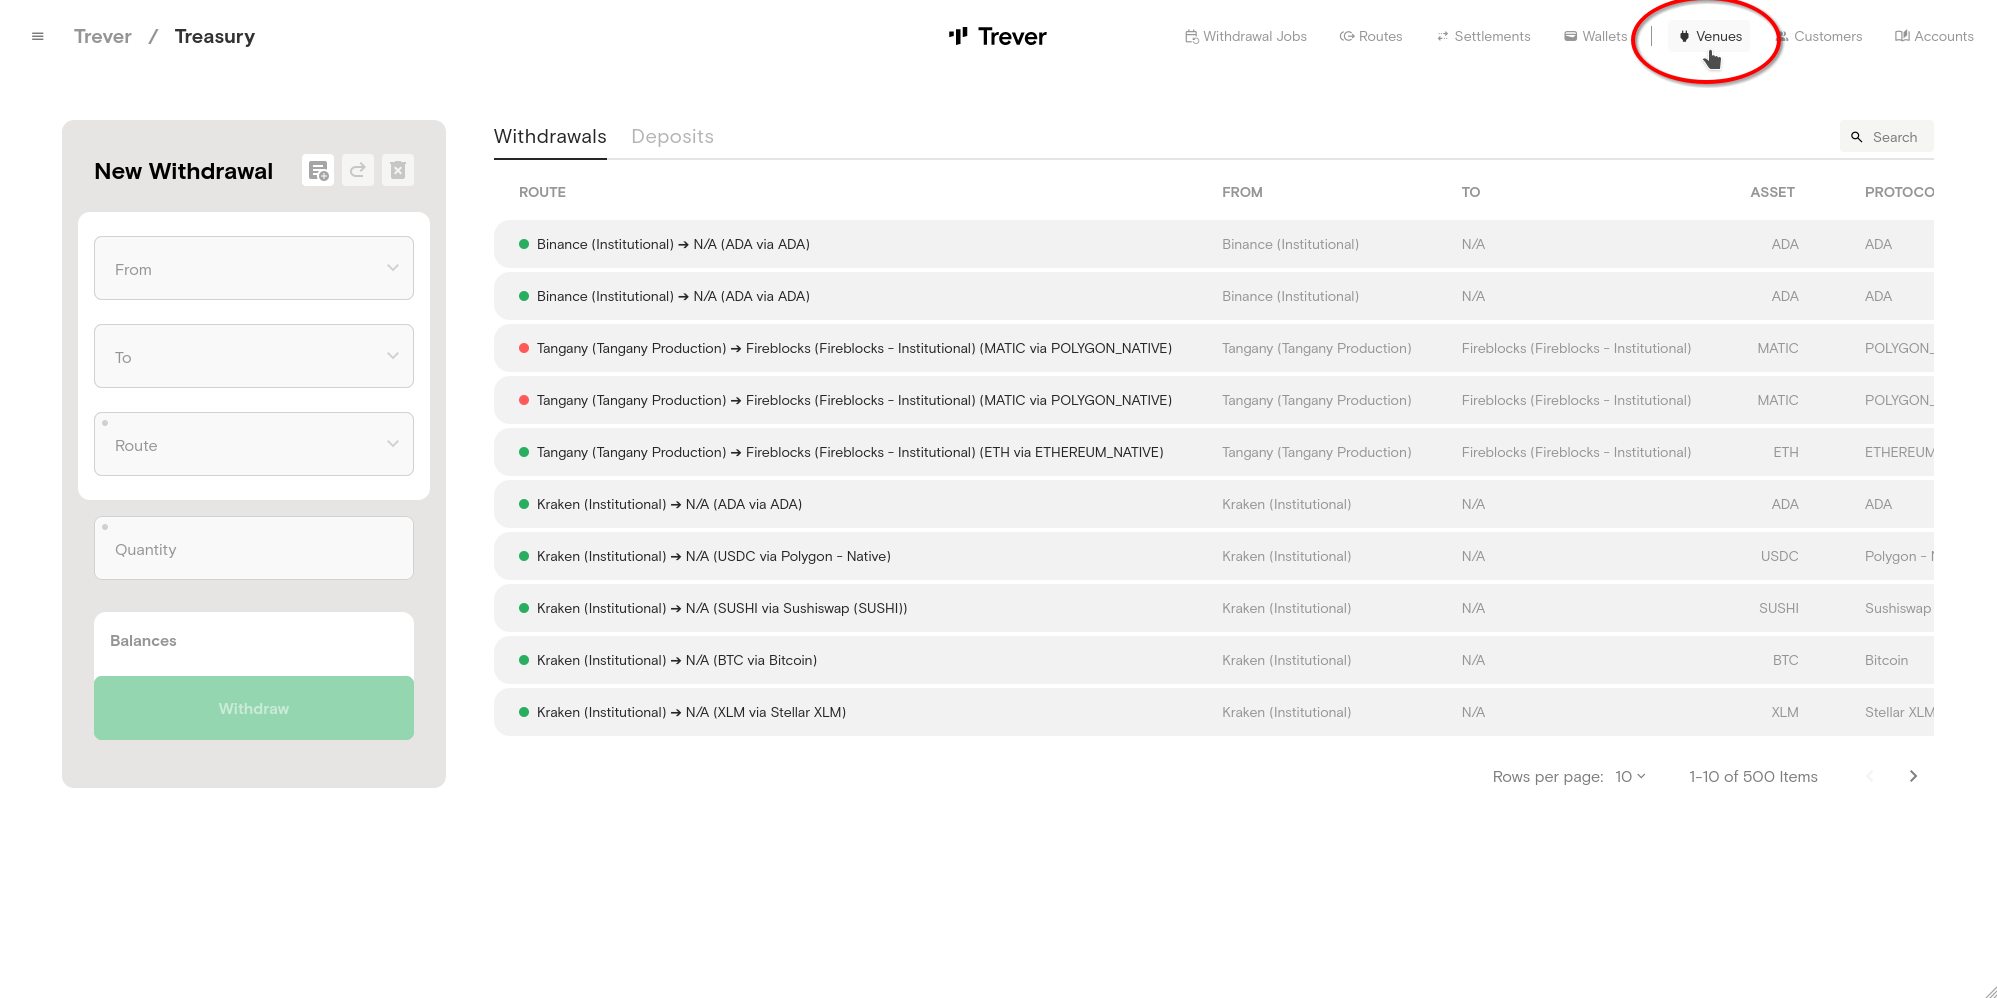
- On the
Venuescreen, click on the desired venue and go to theServicestab. In theServicestab make sure the service typeWOMSis running.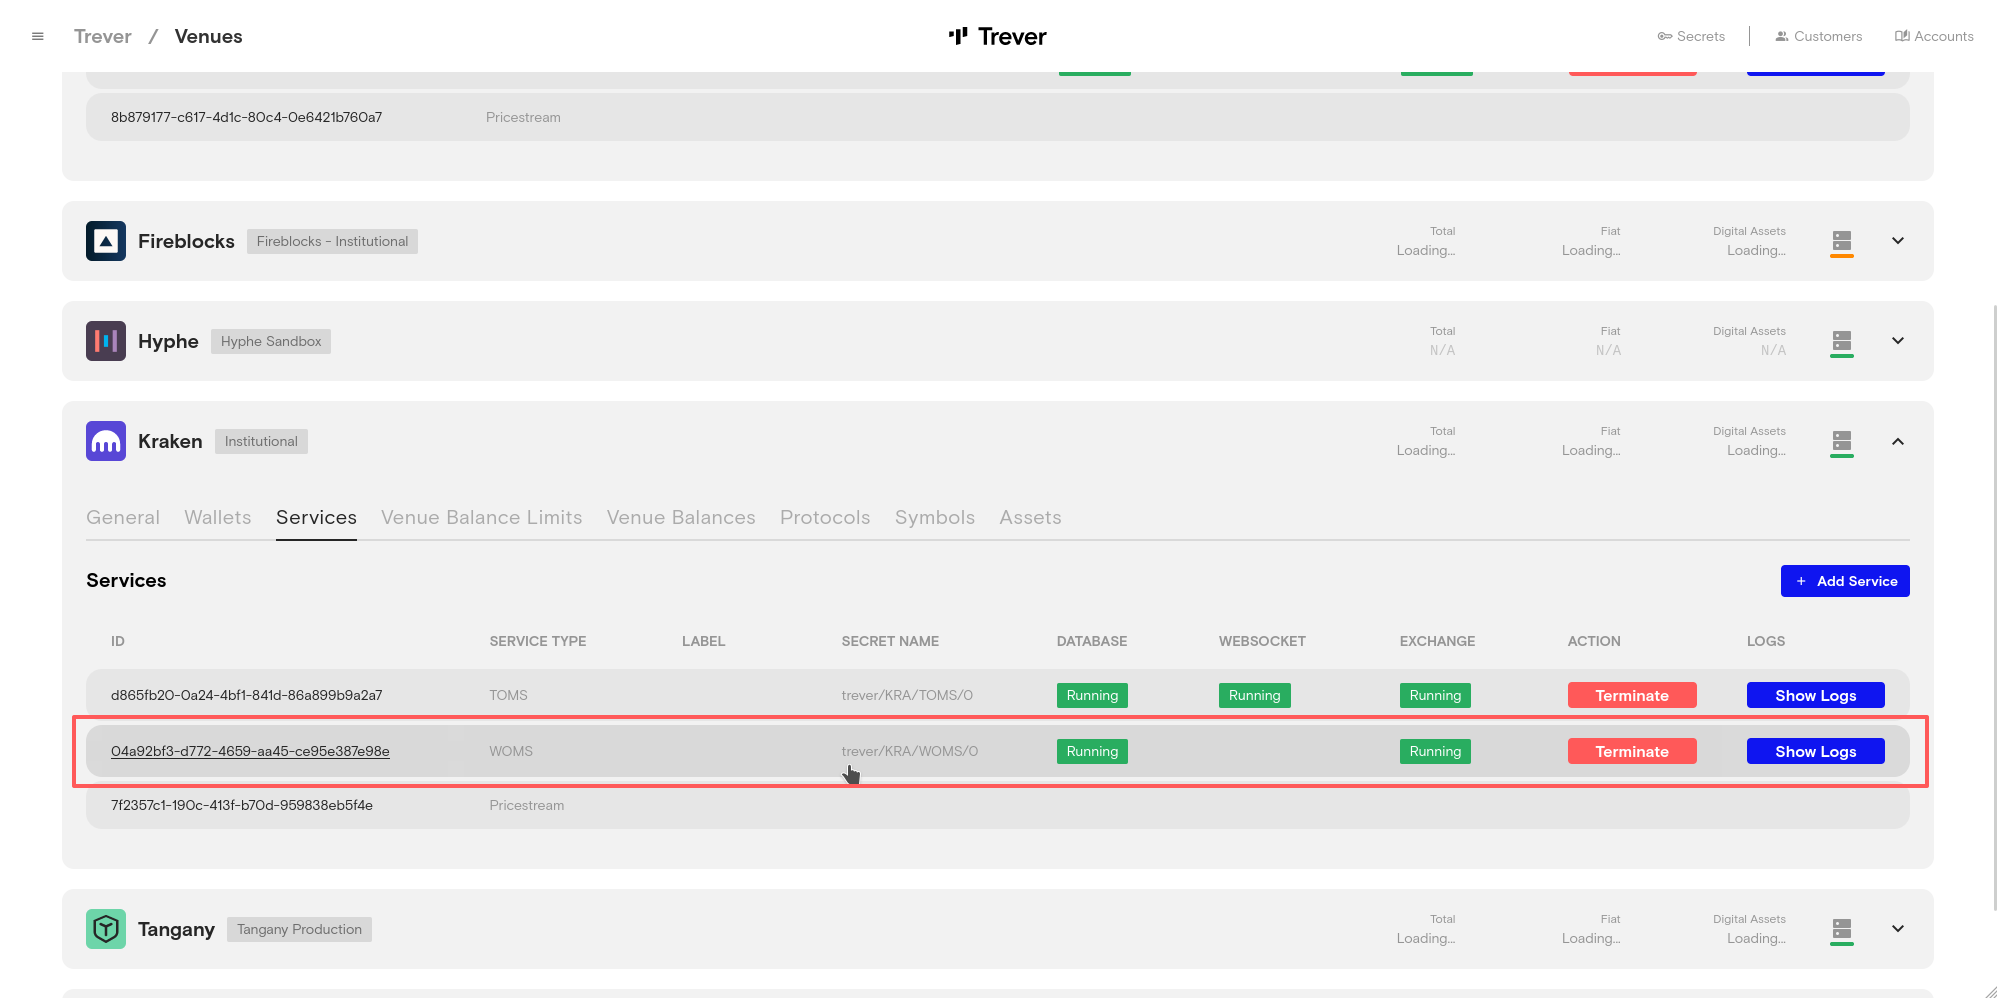
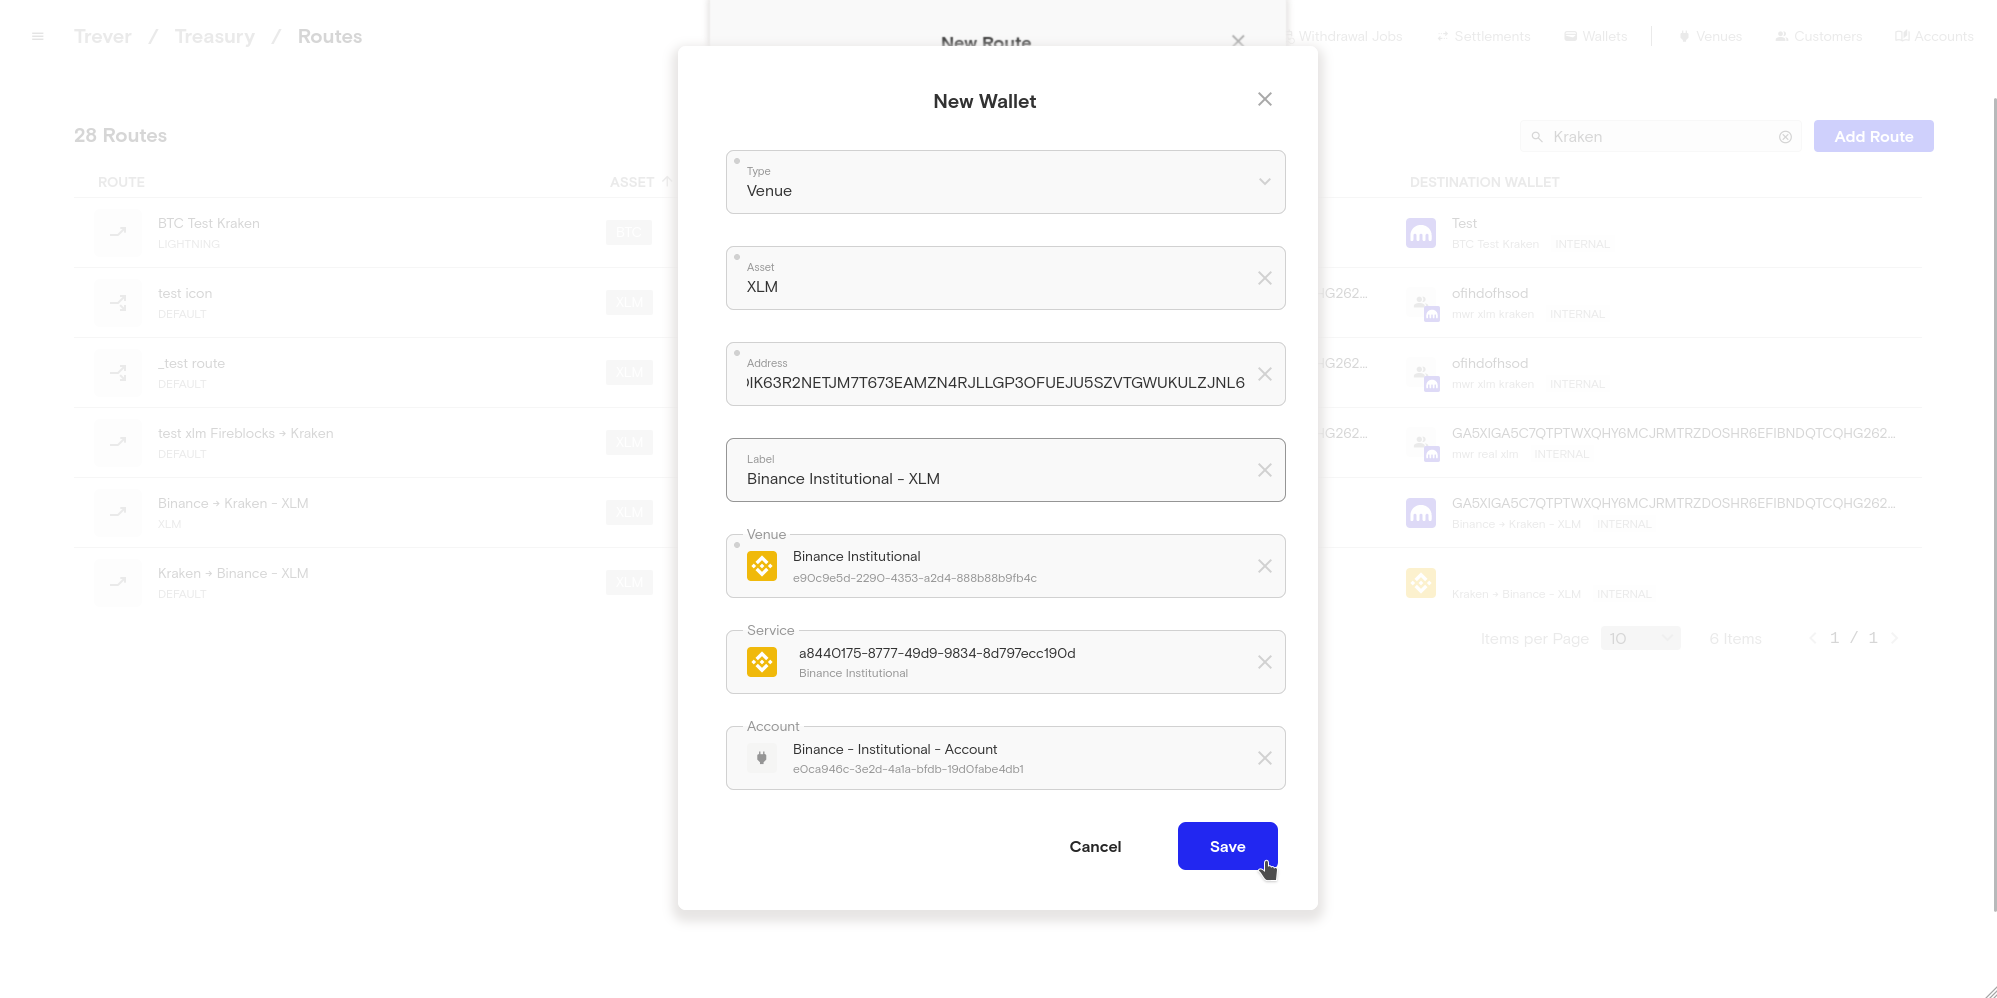
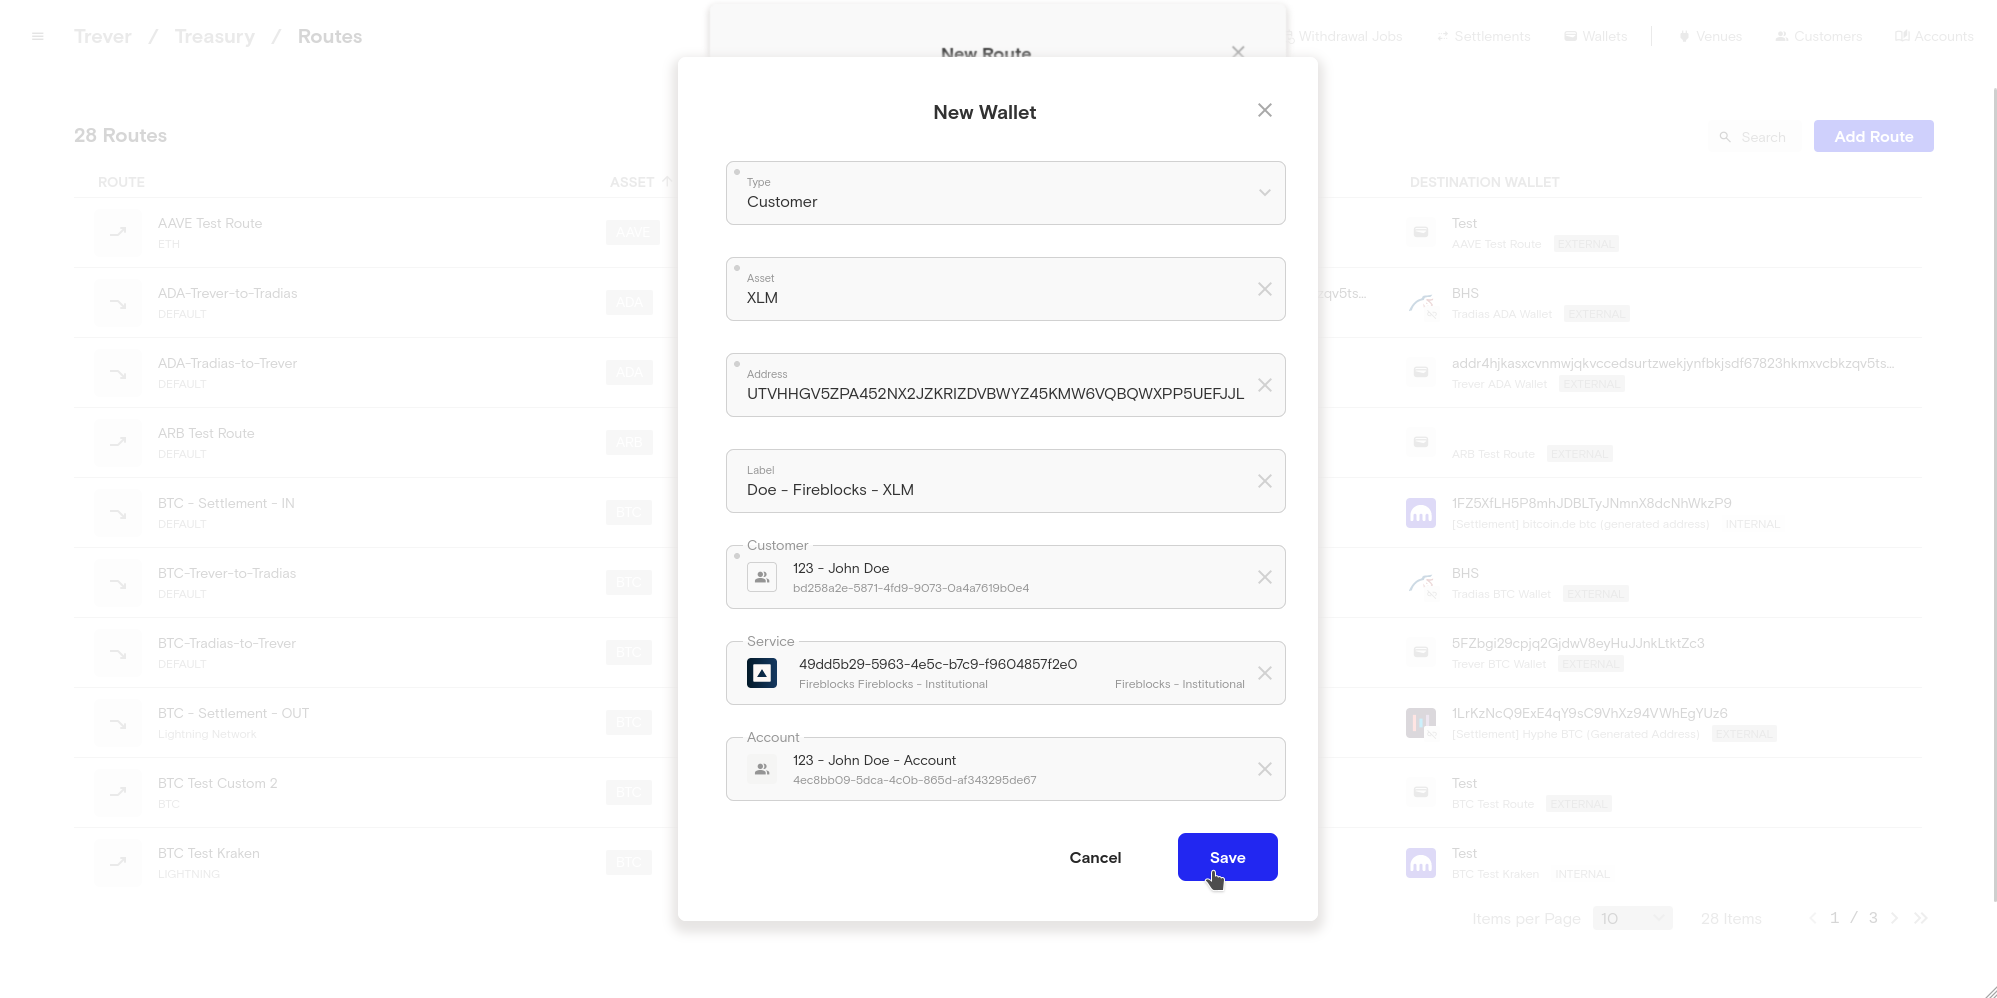
3. Create a Wallet
- On the Treasury Screen click the
Walletsicon in the top right-hand corner.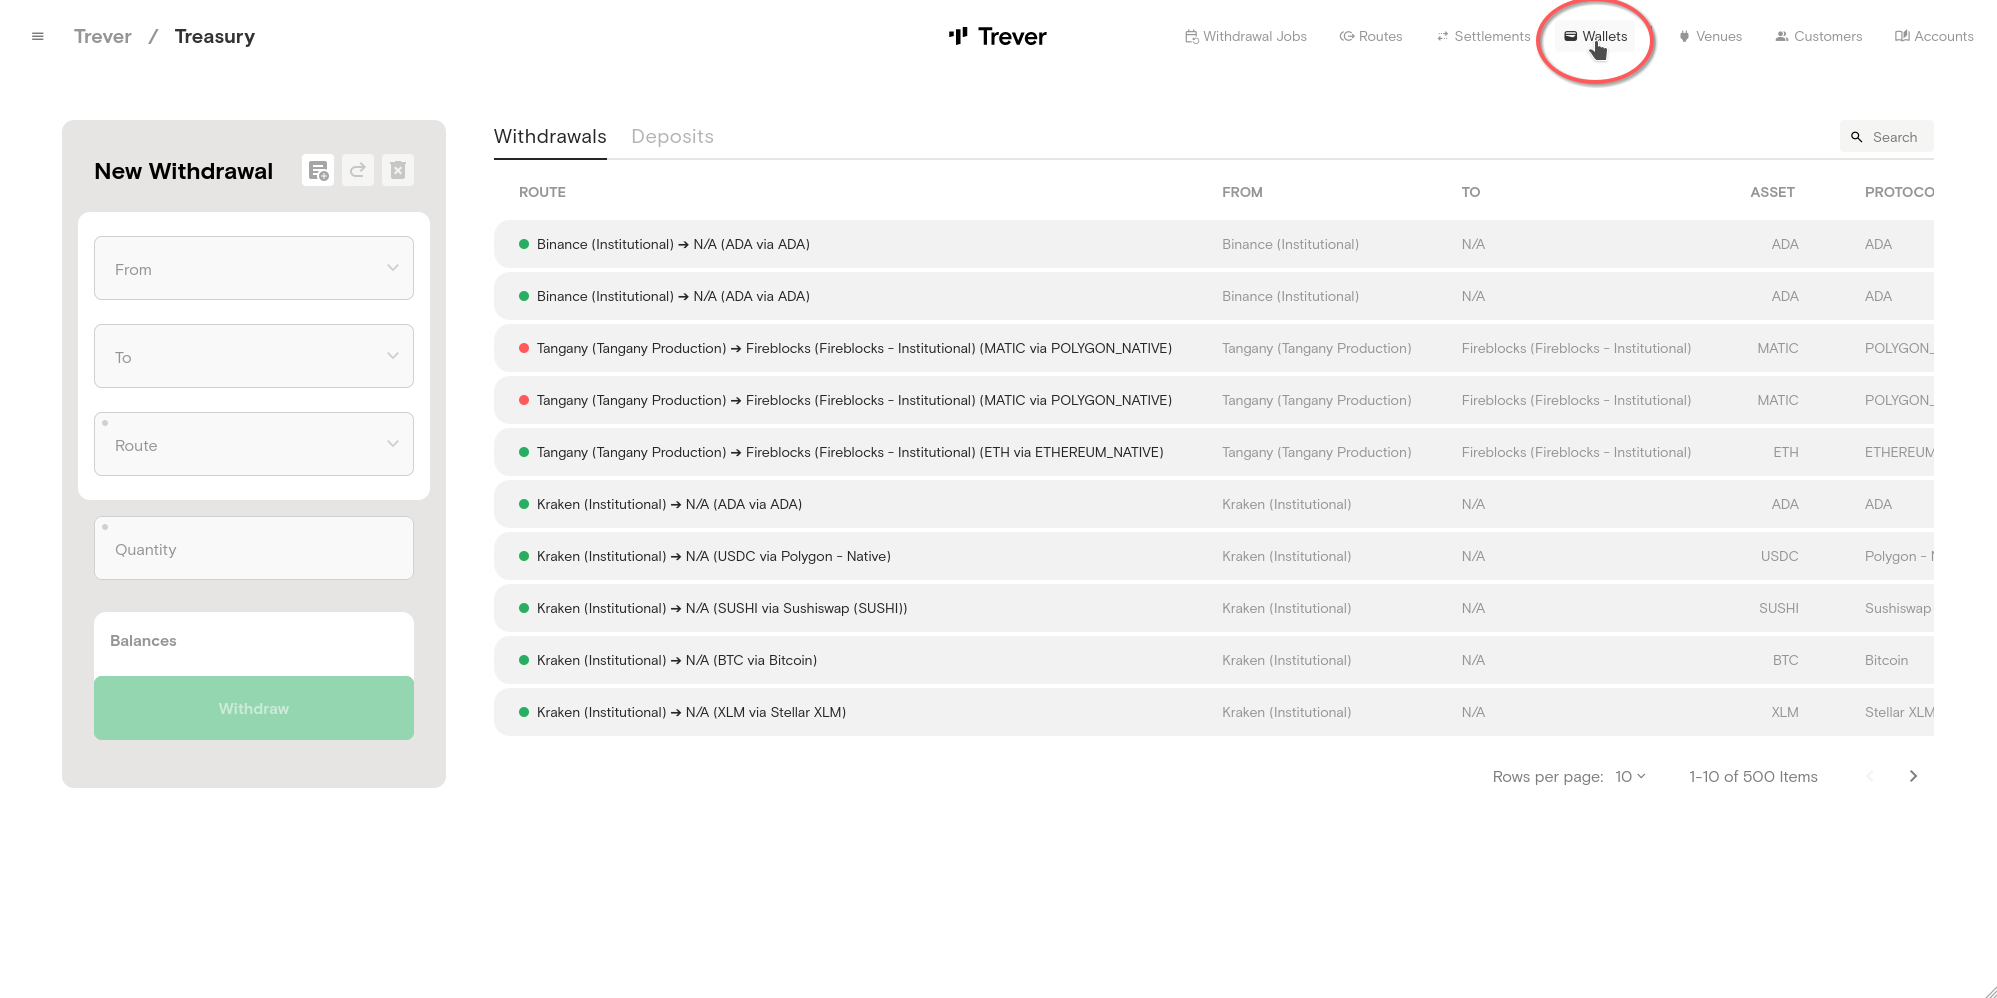
- First, select a type for the new wallet. Select between
Venue,Customer, orOther. - In the following example, a Wallet for FTM on the integrated Kraken account is created. The selected Asset is FTM and the deposit address of the Kraken wallet is stored. A user-readable label is set. The underlying venue is Kraken and the used service is the WOMS Service of the selected venue.
Accounttells Trever which account to use for its bookings once a withdrawal is submitted from this wallet.
- In this example, a customer wallet is created on an integrated treasury venue. Therefore, a customer is selected instead of a venue and the underlying account is a customer account. Further, a WOMS service that can access the wallet is necessary.
3.1 Create Wallet on Venue
For custody venues that support this feature, users can create wallets directly on the venue through Trever. When a user selects one of these venues, additional fields will appear in the wallet dialog. If the Create External Wallet checkbox is ticked, the address field is no longer mandatory.
Fireblocks
In the case of Fireblocks, it looks like this.
 If the user wishes to create a new Fireblocks vault account for this wallet, the Vault ID field should be left blank. A new vault is then created on Fireblocks in the background and the selected asset is added. The newly created vault id and the address of the new wallet are automatically saved in Trever.
When creating a wallet, Fireblocks not only defines the asset but also the protocol. Fireblocks calls the combination of these asset_id. In Trever, the correct asset_id is automatically created from the asset and protocol.
If the user wishes to create a new Fireblocks vault account for this wallet, the Vault ID field should be left blank. A new vault is then created on Fireblocks in the background and the selected asset is added. The newly created vault id and the address of the new wallet are automatically saved in Trever.
When creating a wallet, Fireblocks not only defines the asset but also the protocol. Fireblocks calls the combination of these asset_id. In Trever, the correct asset_id is automatically created from the asset and protocol.
A vault account in Fireblocks is a collection of wallets. If the user wants to add a new wallet to an existing vault, they must enter its ID when creating the wallet in Trever. Entering a vault id that does not exist leads to an error. Each asset-protocol combination can occur exactly once in a vault. Specifying an existing asset for an existing vault id also leads to an error.
Tangany
Tangany requires a customer ID to be created. This can be seen as an account ID. It is possible to create any number of wallets on such an account.

If a new wallet is created on Tangany, addresses for all available assets are automatically created for this wallet. The newly created wallet id is saved in Trever.
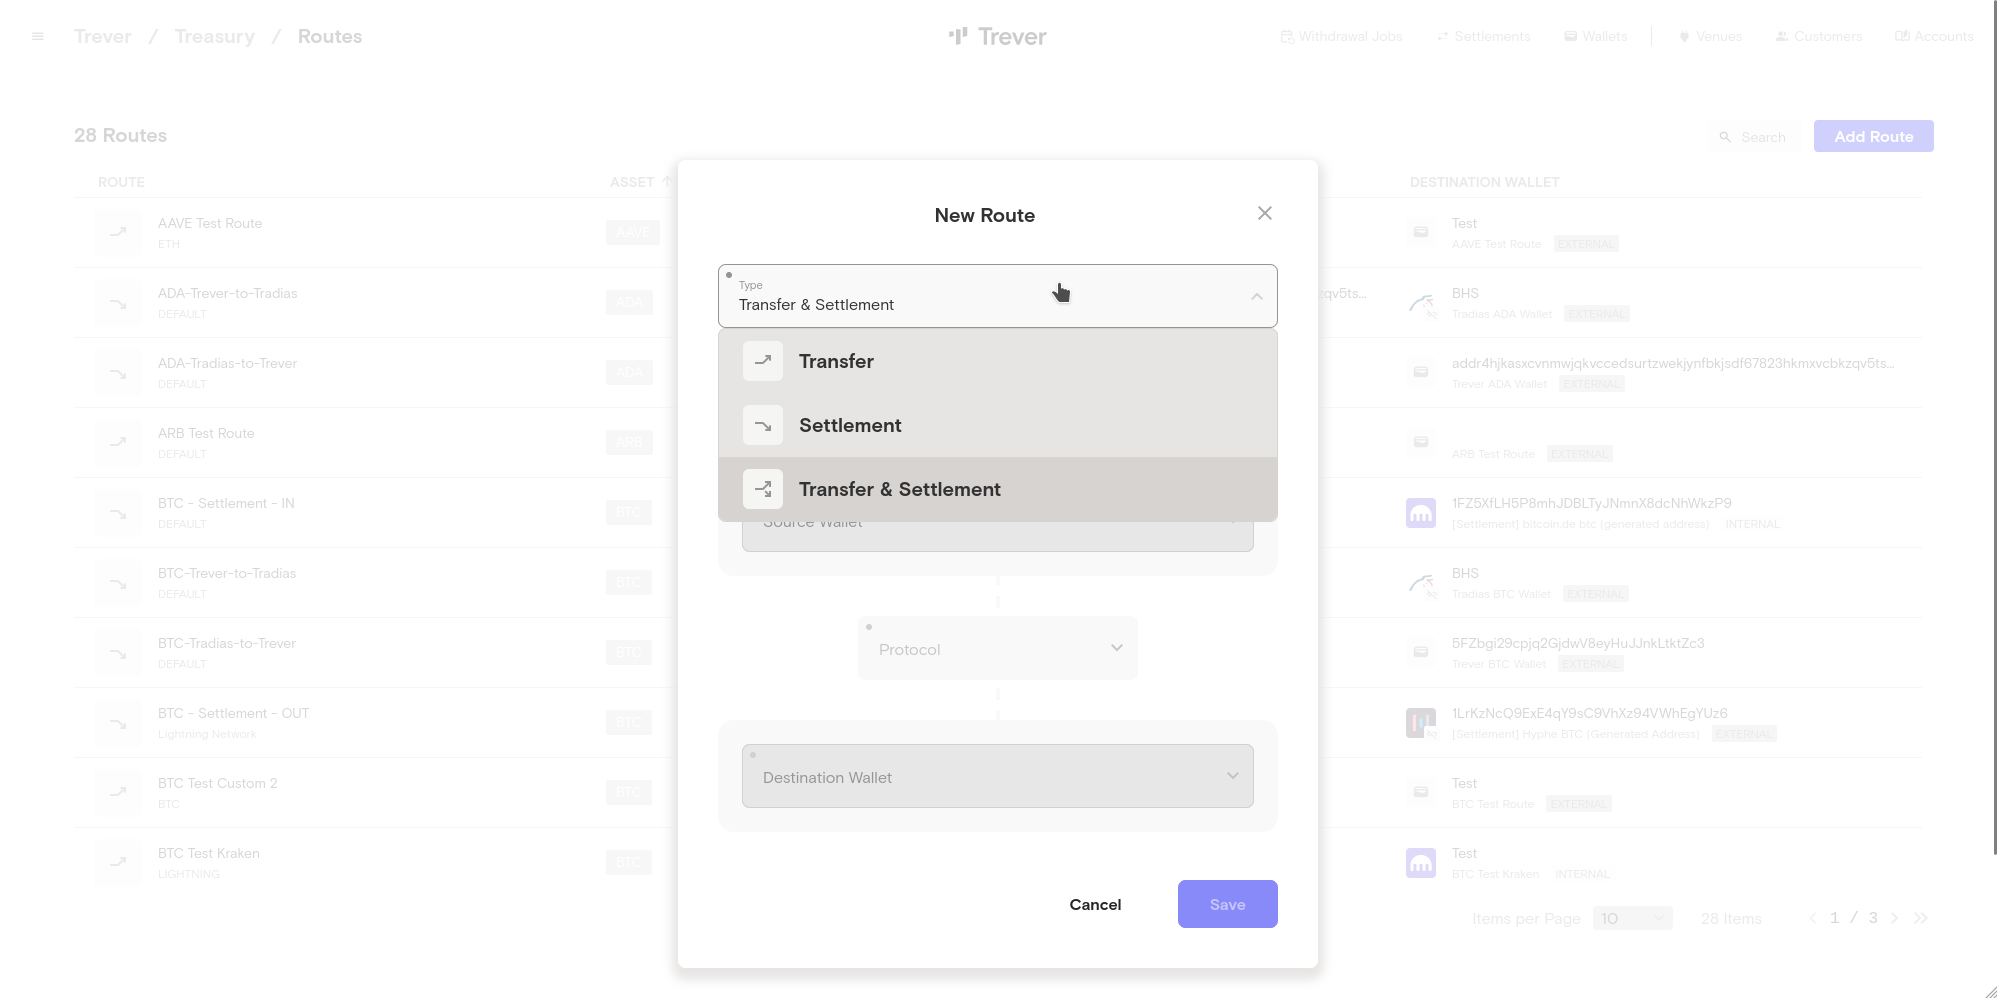
4. Create a transfer/settlement route
- On the Treasury Screen click the
Routesicon, in the top right corner.
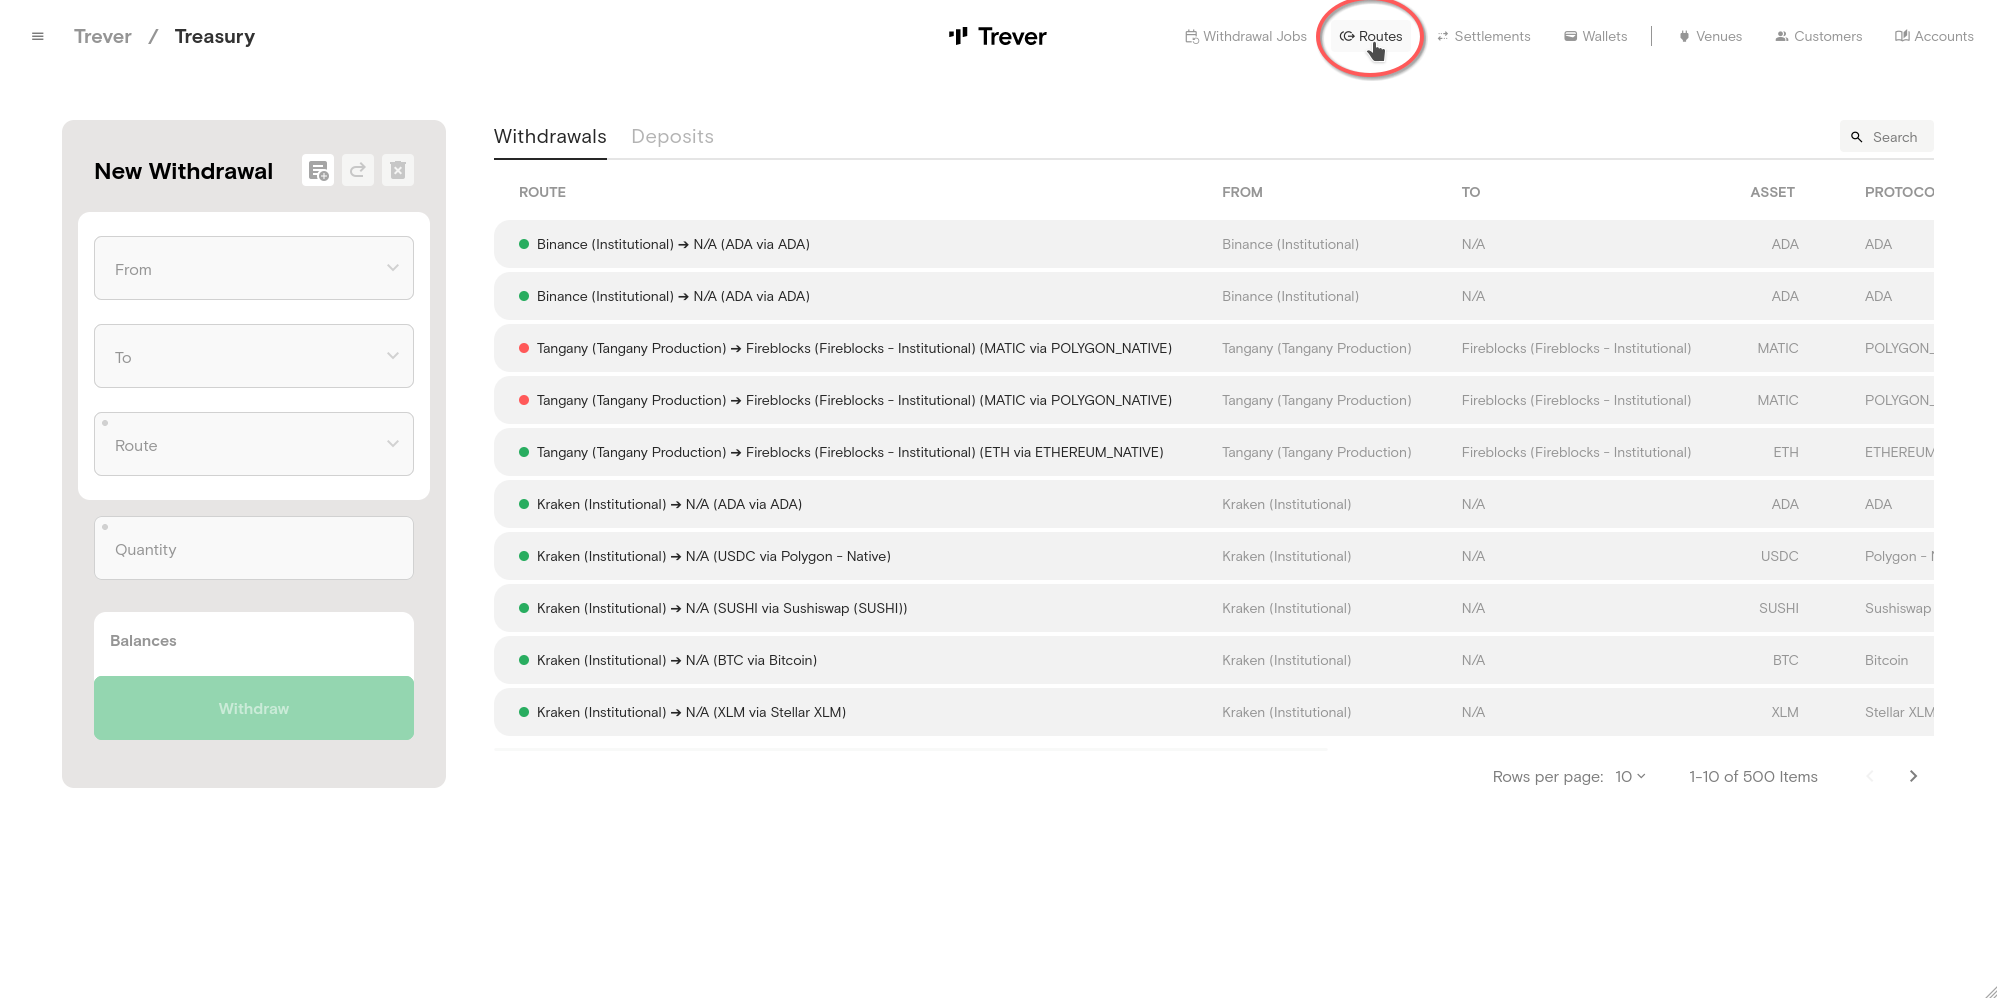
- Click the
Add Routebutton in the right top corner, to create a new route. - First Select a
Type. The type defines what a route is used for:
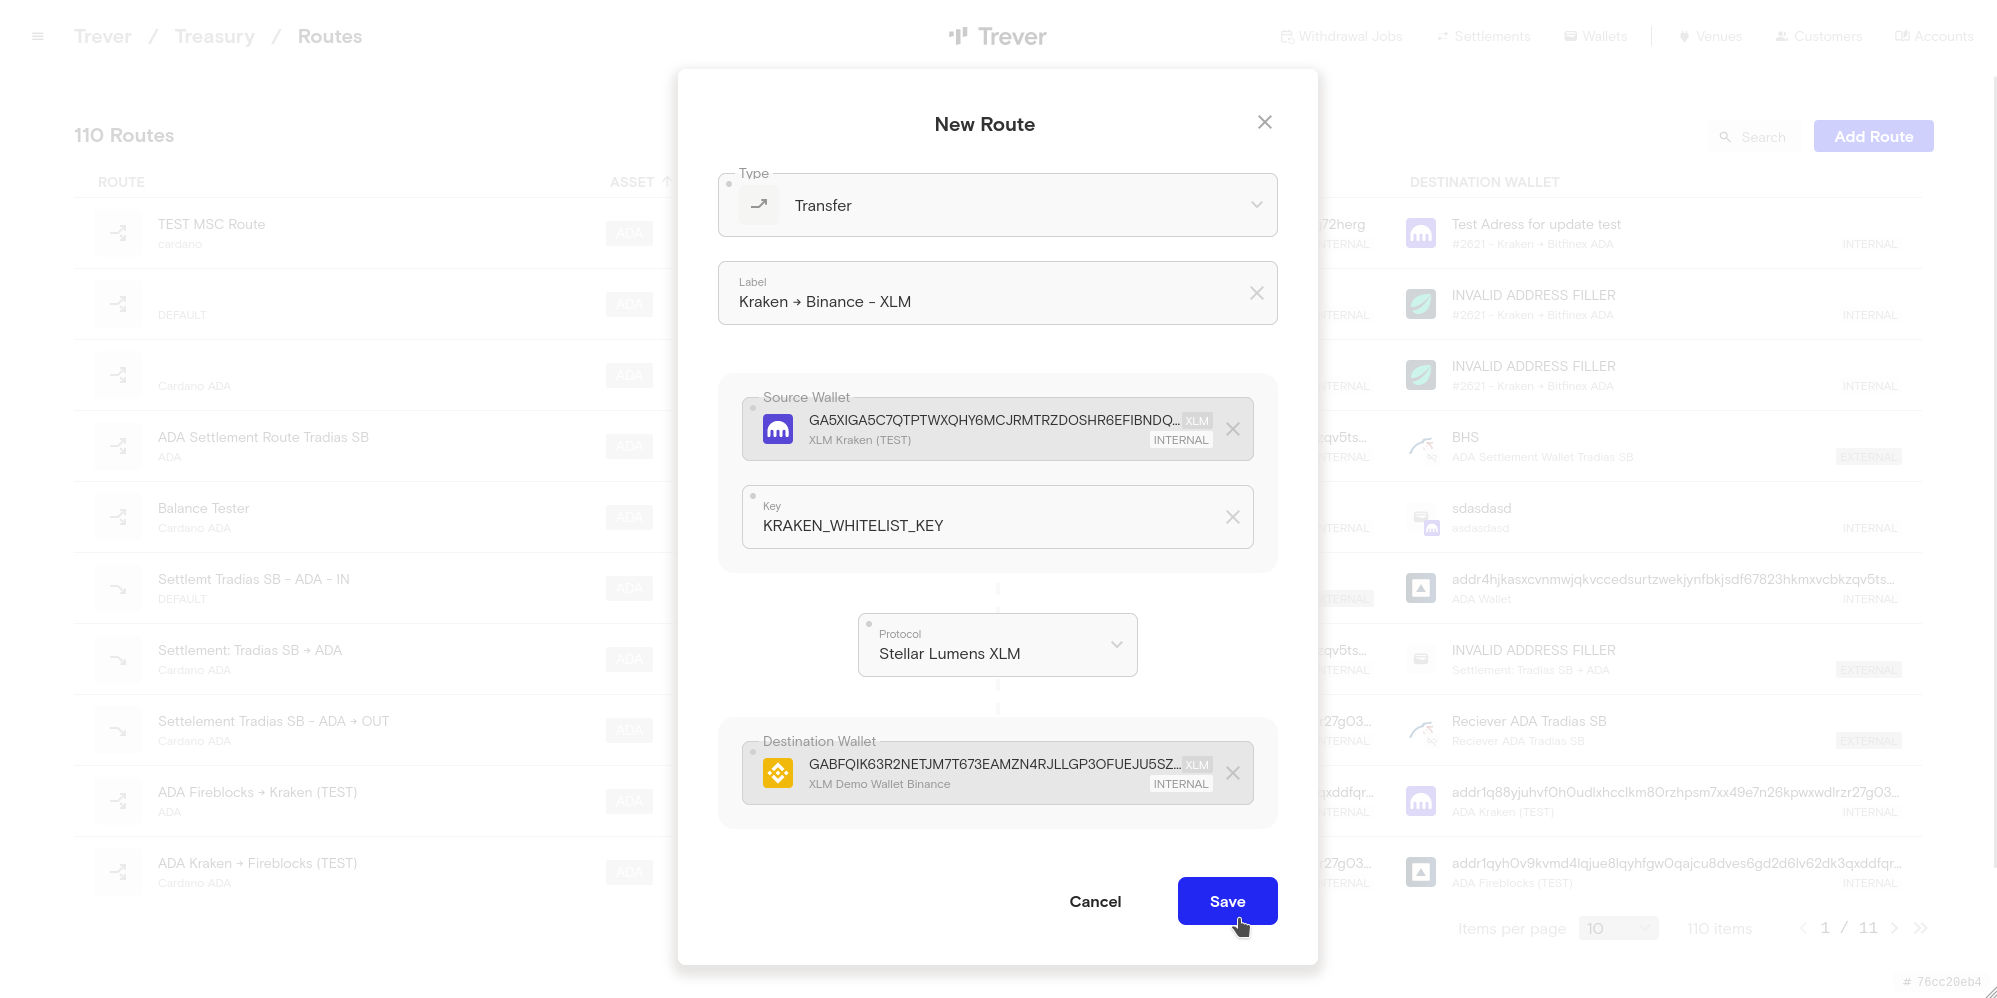
- Define a label for the route. This is a free-text field that should ideally explain to the user what the route does. In this example, the label is
Kraken -> Binance - XLM. This tells the user the route is used to transfer XML from a Kraken Wallet to a Binance wallet. - Select a wallet, that should serve as the source of the transaction, from the
Source Walletdrop-down menu. Depending on the chosen venue, an extra input field can appear in the dialog. E.g. If the source is Kraken, aKeyis needed that refers to the deposit address. Other venues require aDeposit address. - Select a wallet, that should serve as the destination of the transaction, from the
Destination Walletdrop-down menu. - Select the asset that should be transferred from the
Assetdrop-down menu. Depending on the asset an extra input forProtocolappears in the dialog.
4.1 Adding a Withdrawal address on the Venue
For custody venues that provide this option, users can add addresses to the list of allowed withdrawal addresses on the venue through Trever.
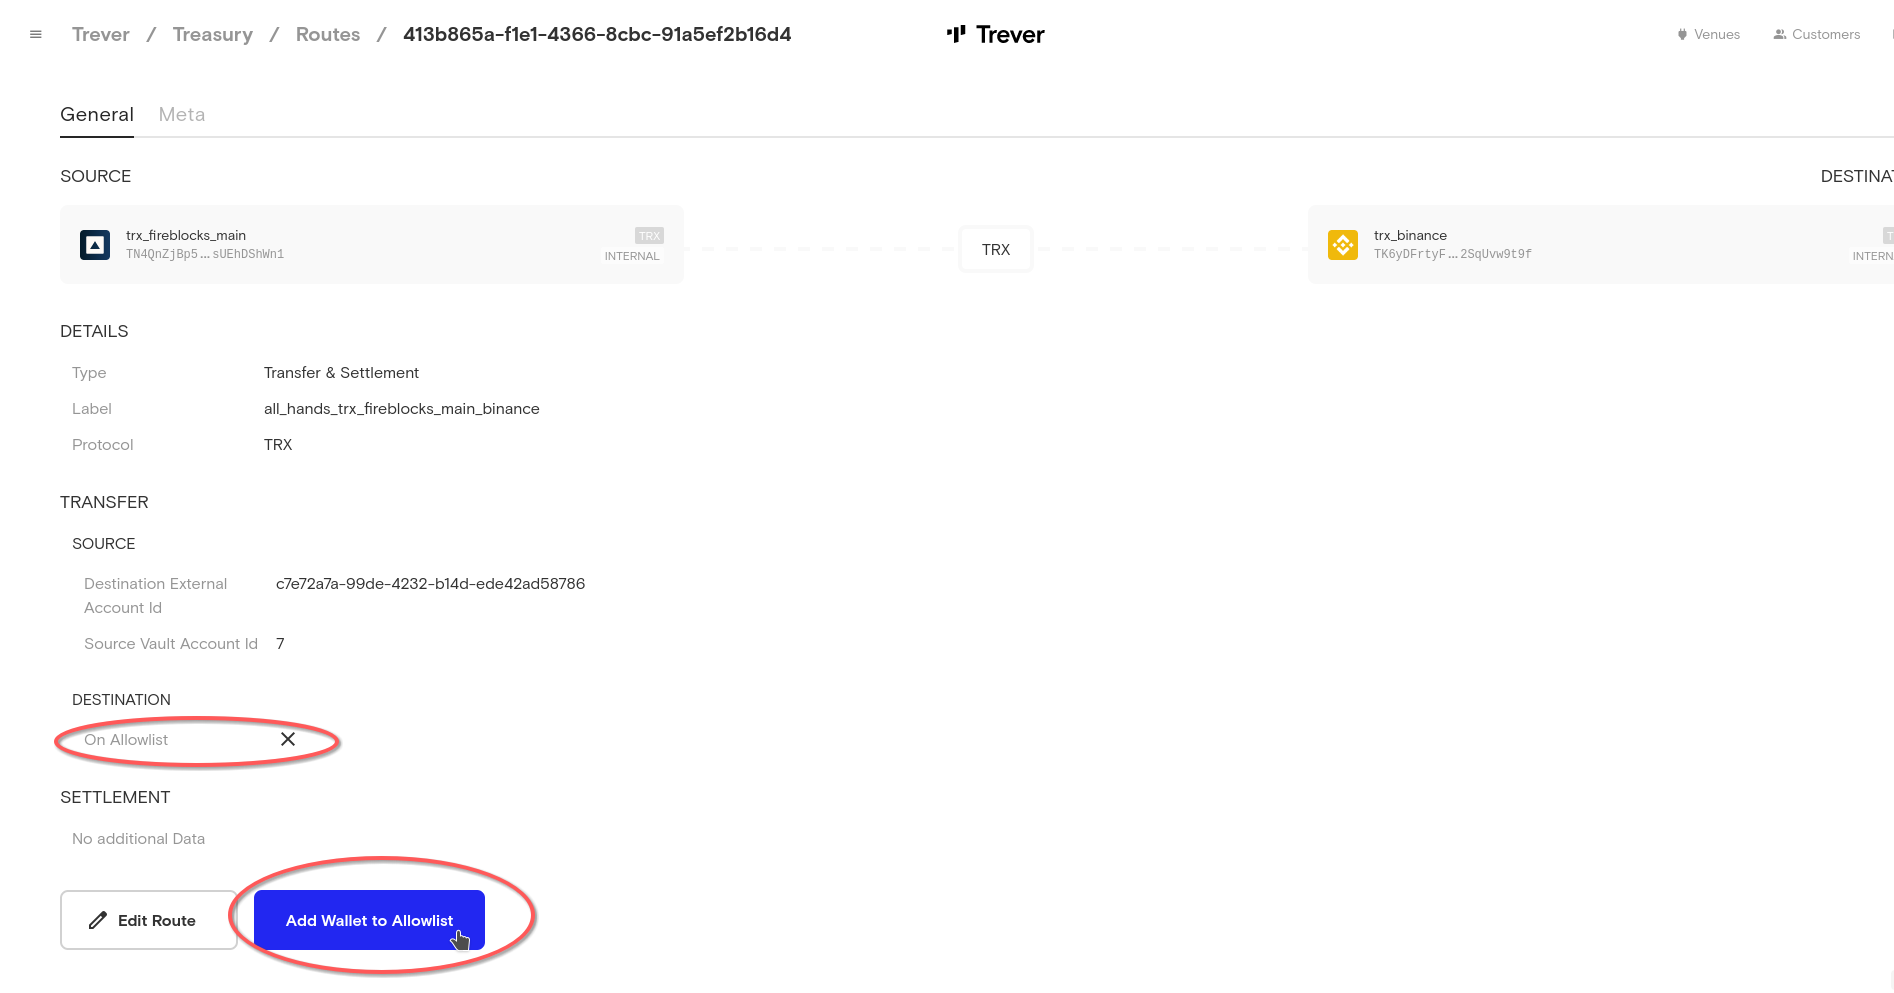 Once a route has been created, the user has the option to add it to the list of allowed withdrawal addresses at the venue by clicking on the
 Add Wallet to Allowlist button. Entering an existing External Wallet ID in the Destination External Account Id field will add the selected asset_id (see 3.1 - Fireblocks) to the existing external wallet on Fireblocks. Entering an external wallet ID that doesn’t exist will result in an error.
Fireblocks
In the case of Fireblocks, an external wallet is created and the ID of this external wallet is stored in the Trever route. An external wallet in Fireblocks is a collection of valid withdrawal addresses. As with vaults, the rule is that an asset can only be represented once in a collection.
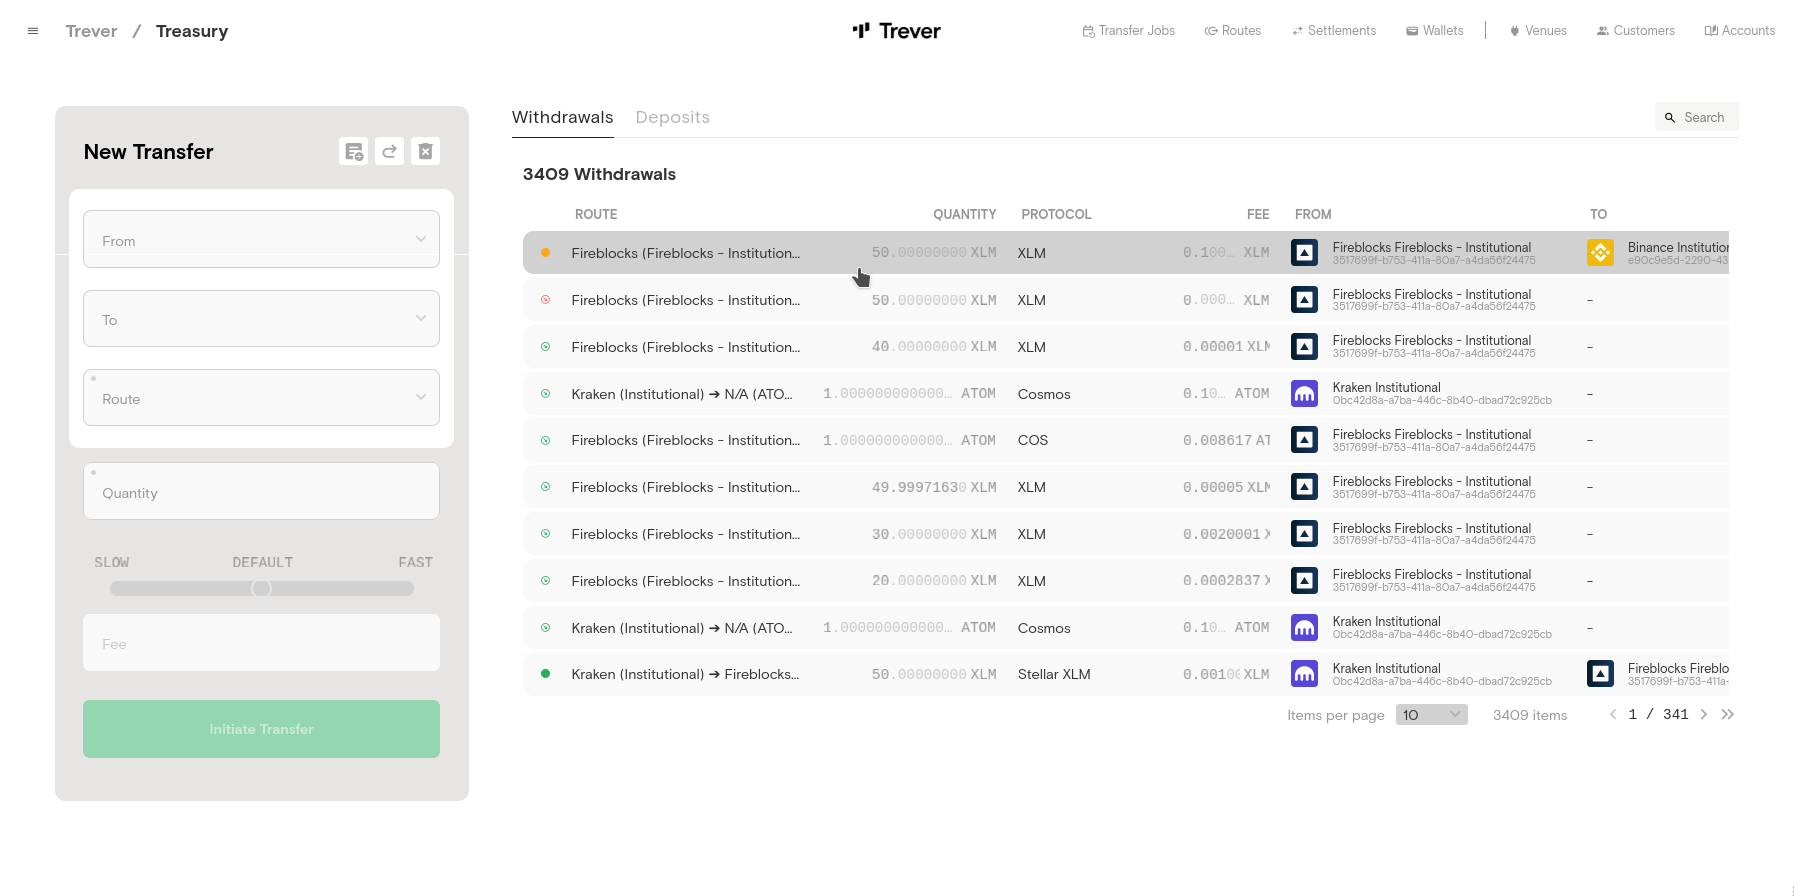
5. Submit a Withdrawal in the Trever Treasury
- Select a treasury venue, that should serve as the source of the transaction, from the
Fromdrop-down menu. - Select a treasury venue, that should serve as the destination of the transaction, from the
Todrop-down menu. Choose custom, to send to an external deposit address or wallet. - Select the asset that should be transferred from the
Assetdrop-down menu. - Select the asset that should be transferred from the
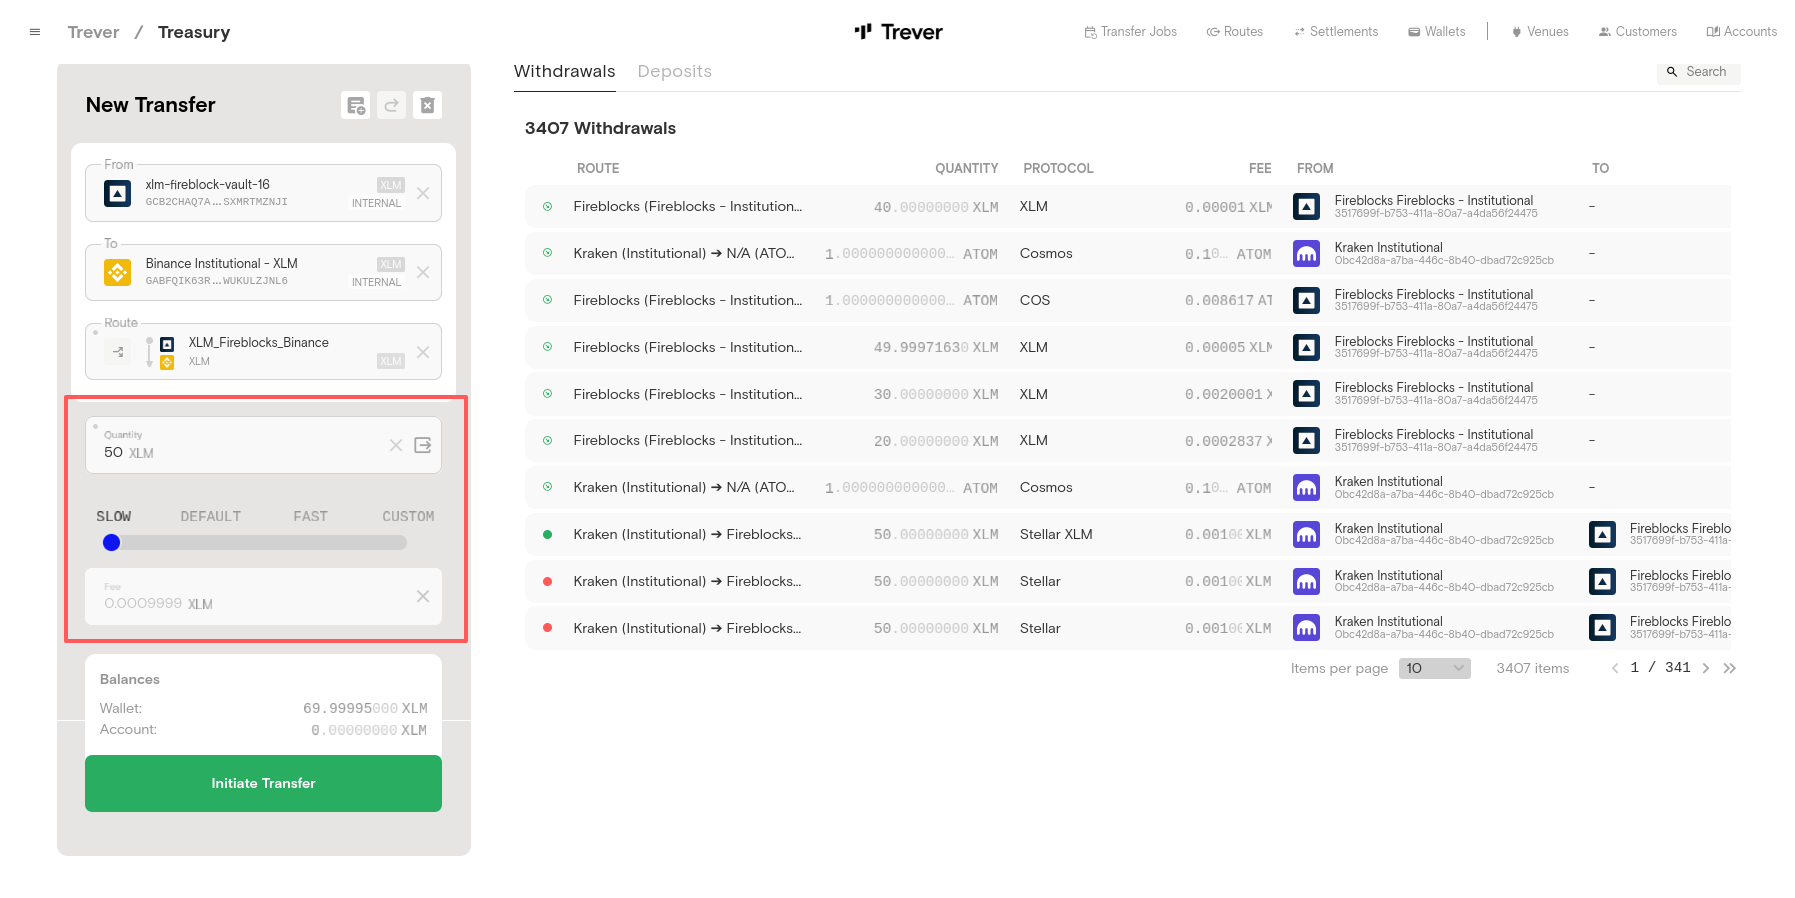
Routedrop-down menu. IfCustomwas selected inTothe deposit address must be defined in the Route. TheRoutedrop-down menu only shows routes that match the source and destination selected inFromandTo. - Enter a Quantity. Available funds, per venue, are shown in the submit dialog.
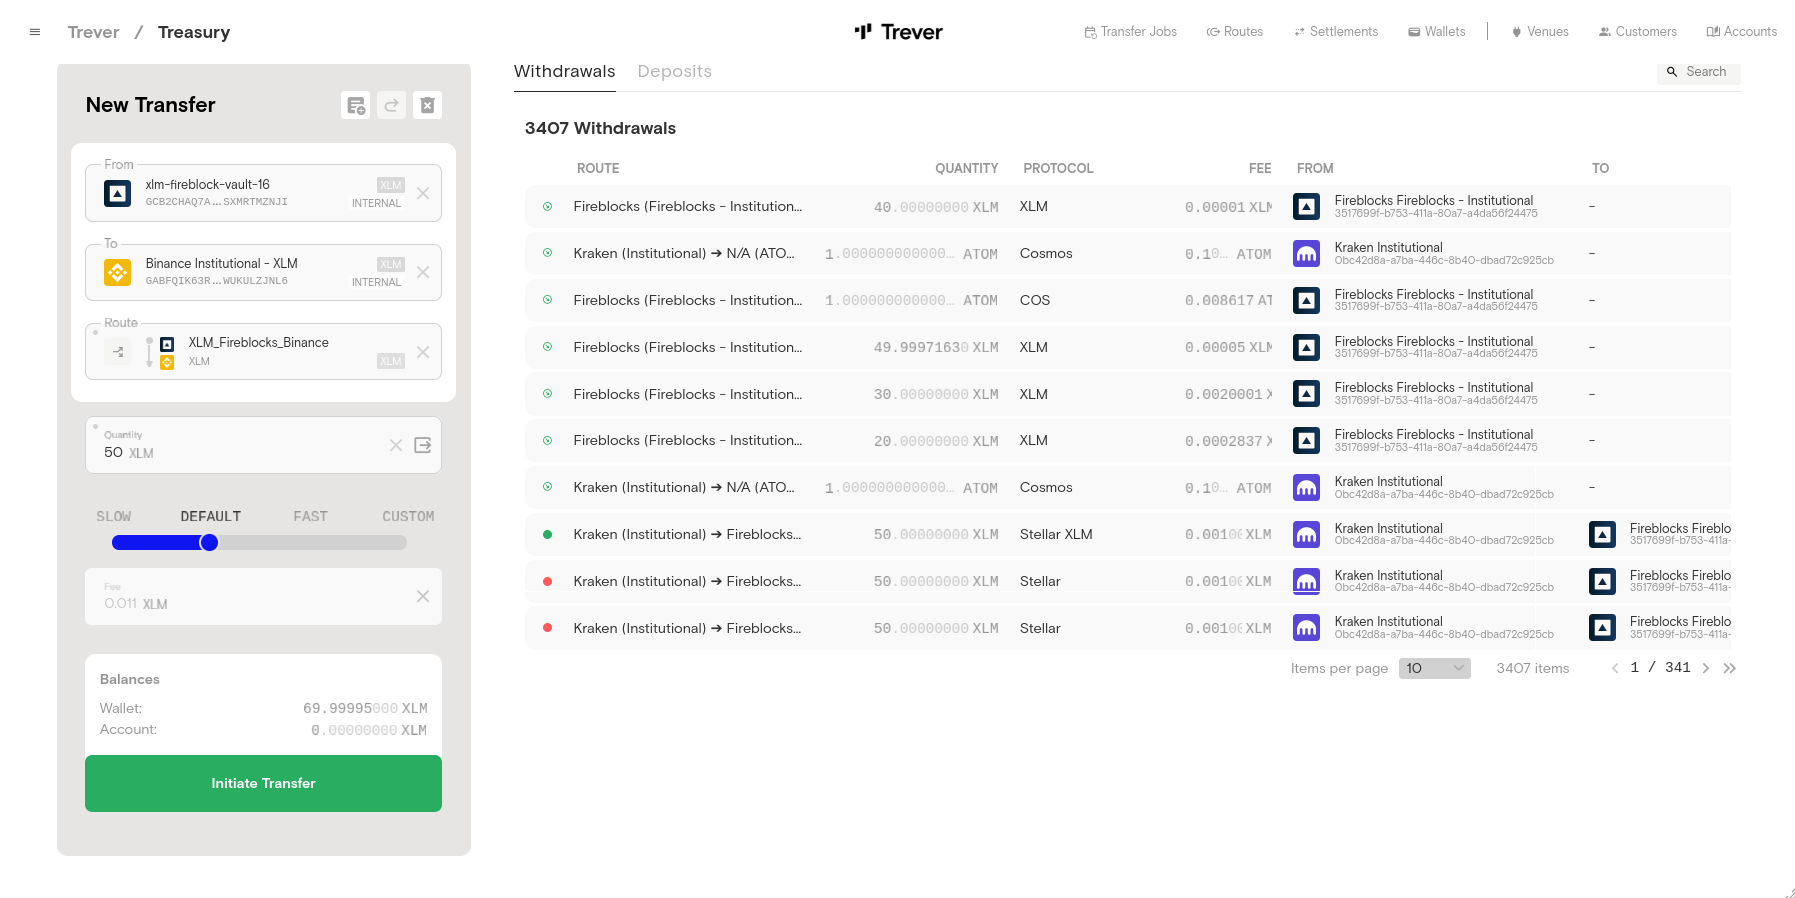
- Optionally, enter a note.
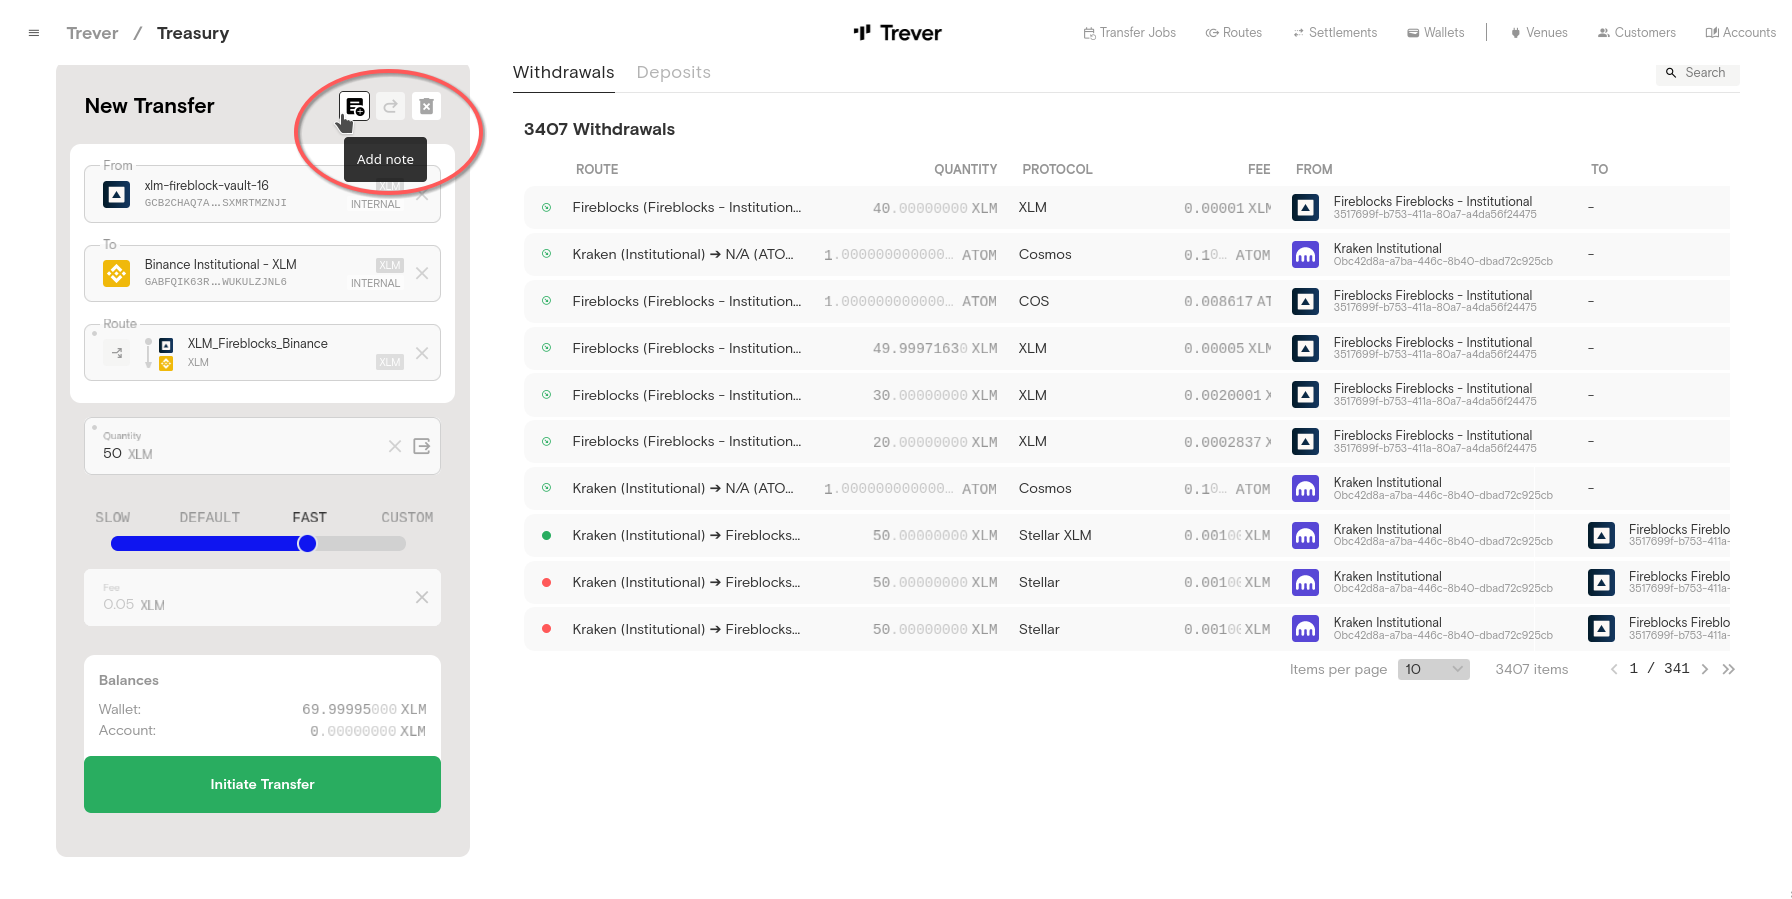
- Select a speed level for the transaction.
 The transaction fees vary depending on the selected speed level.
Please note that this is an estimate of the fees that Trever collects from the underlying venue via API. The actual fees may still differ slightly.
The transaction fees vary depending on the selected speed level.
Please note that this is an estimate of the fees that Trever collects from the underlying venue via API. The actual fees may still differ slightly.
 If the slider is moved to
 Custom, the user can set the fee himself. Please note that not all venues offer this.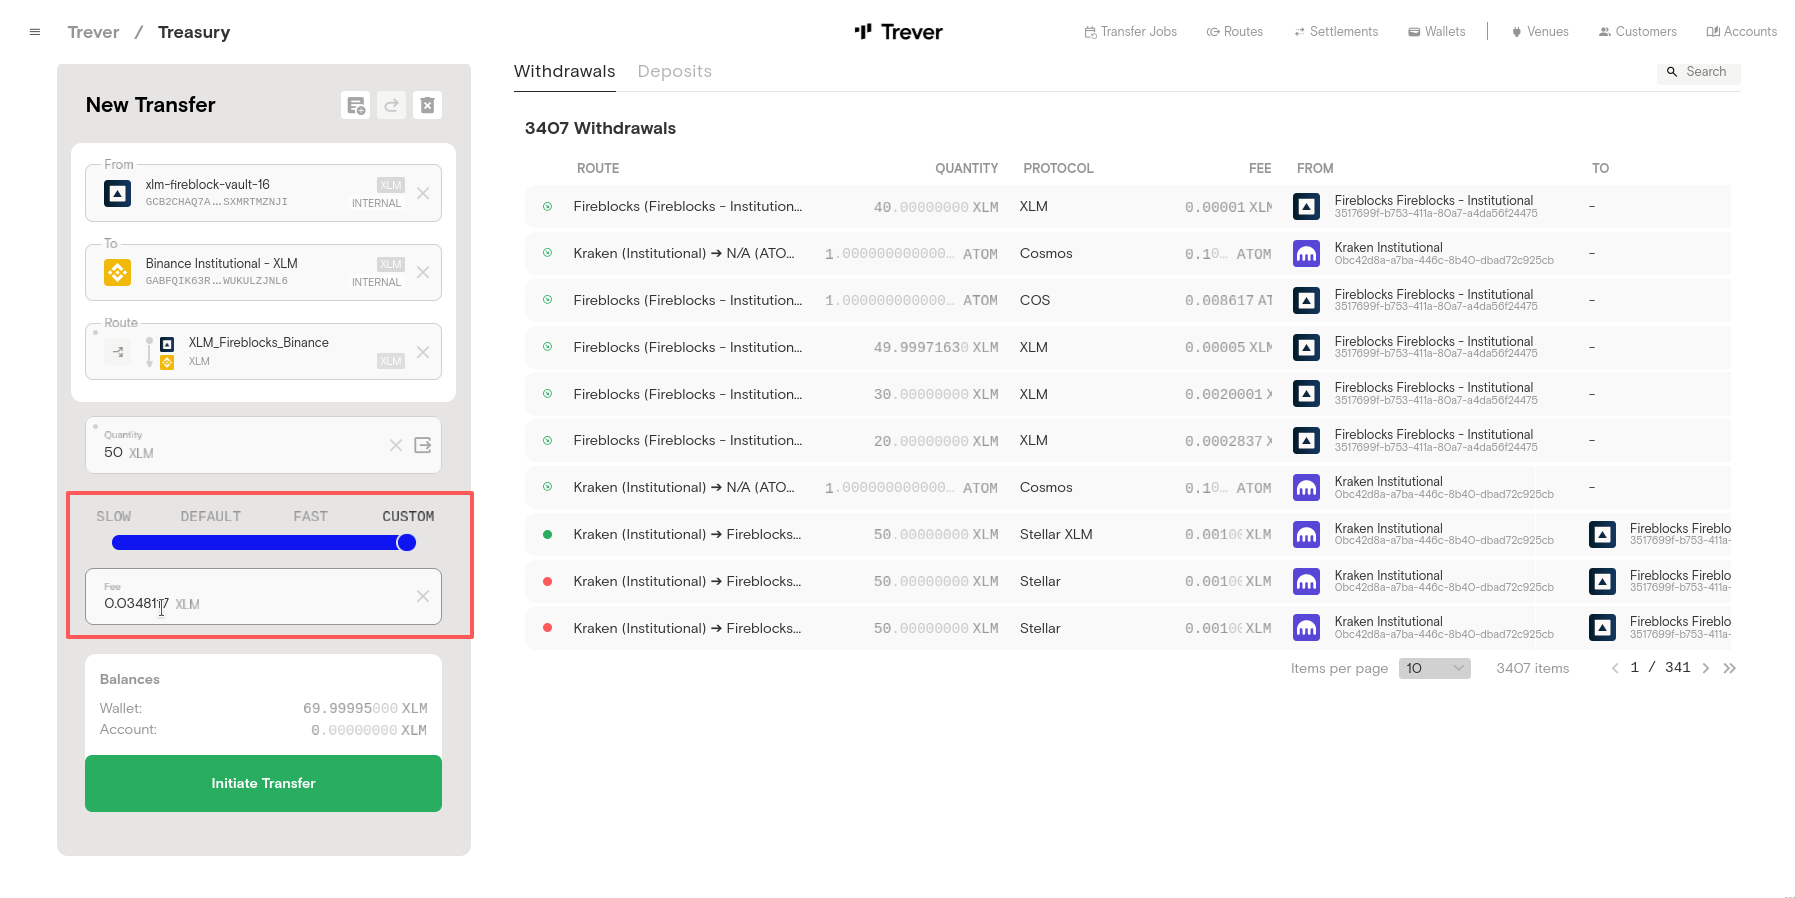
- Click the
Submitbutton.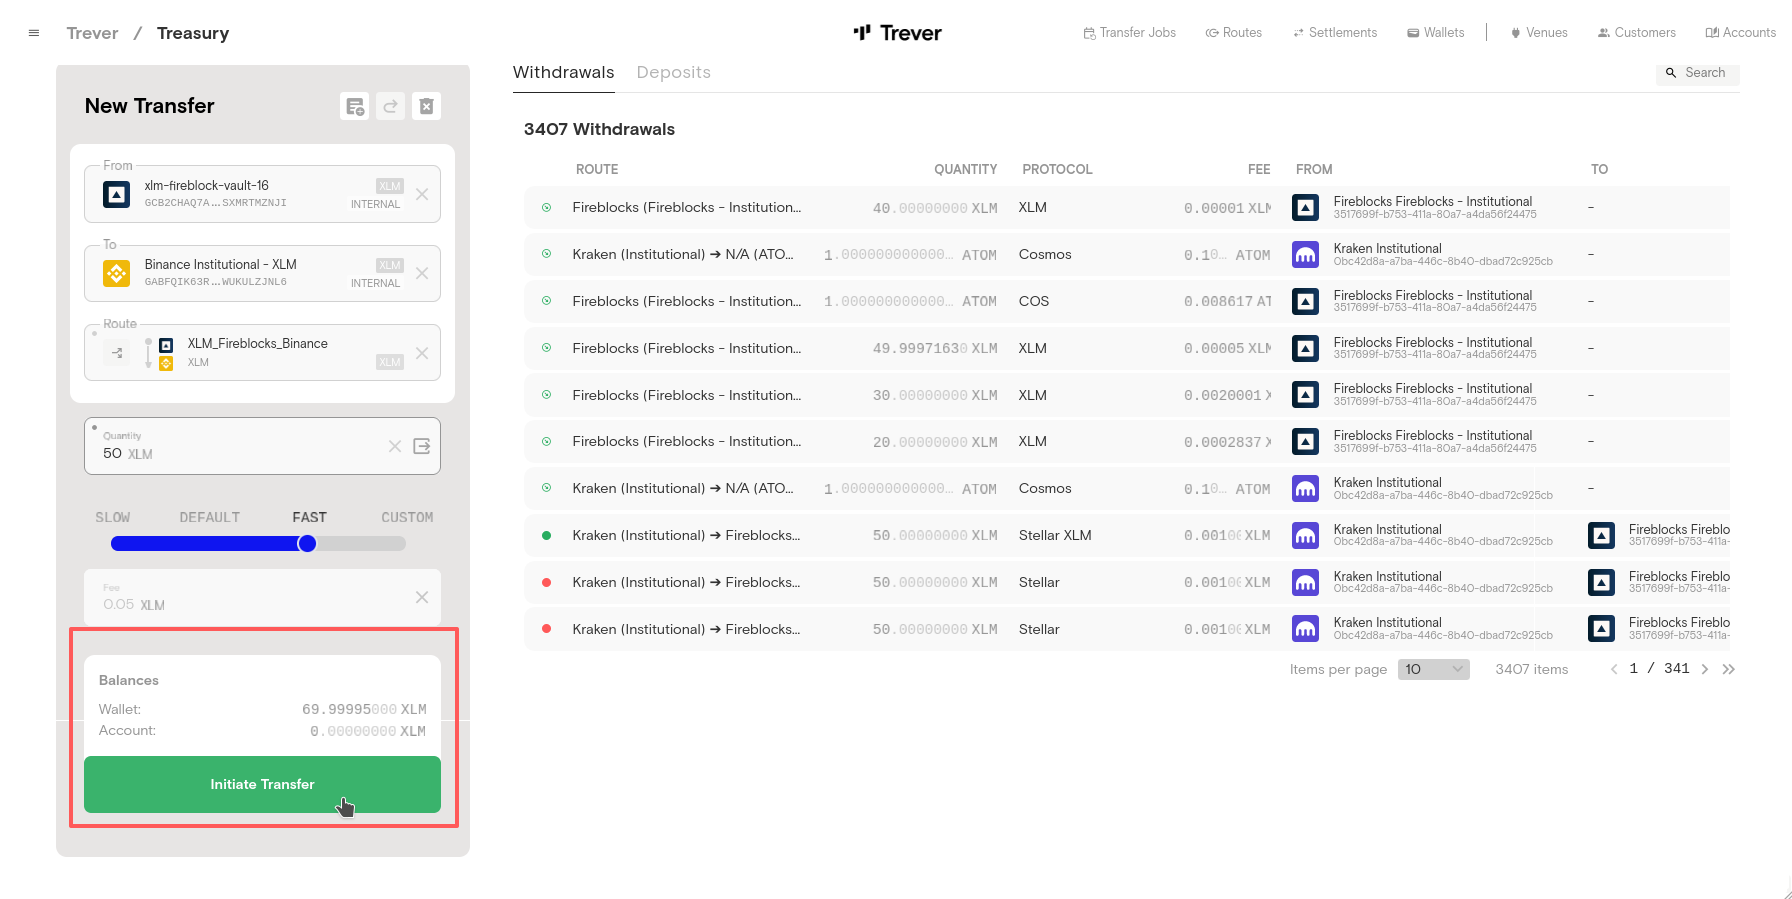
- The initiated withdrawal will immediately appear in the
Withdrawalslist. The blue dot identifies this withdrawal as pending. If the submission was successfully submitted to the underlying venue, the dot turns green, if not, it turns red.